PART THREE, of FOUR:
5 February 2009
PREPARATION OF POLISHING TOOL :
Returning to practice to cover the tool with "candy squares of pitch", to be pasted on the same, with simple local and light softening one facet of the squares with a candle flame,, and then fixed in position on the glass with a little thumb pressure;, may be useful to read my article here on this blog, with various images , Titled: “Tool with "candy" pitch”
Then I prepare the tool drawing on it the future position of the squares.
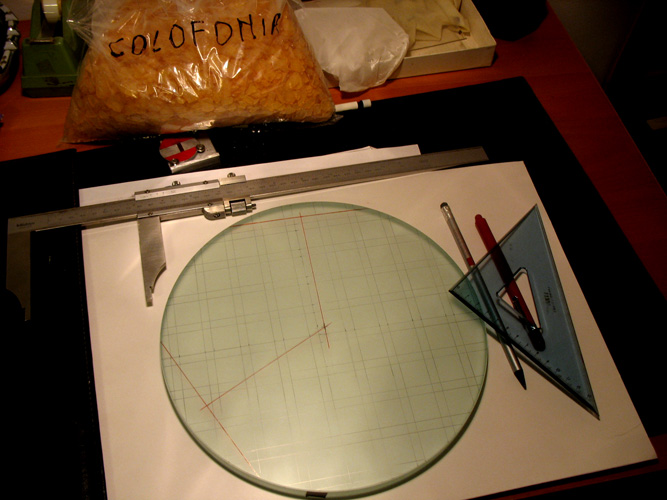
And to start, I follow the simple method and therefore brilliant, to locate the tool center in a graphical way, tracing two chords at random; then with the help of a bracket I draw the perpendicular to the centerline of each of them (in red colour in next image), with the result that the point where the two perpendicular intersect is the center of the mirror.
The golden rule here, for a mirror making tool , is that the center of the mirror must be covered by a square of pitch, BUT the center of this square does NOT coincide with the mirror center.
This is because in the entire processing of mirror making, all symmetries must be avoided, (Symmetries like the points of start and stop work, or those from starts and ends of turn around the table etc).. Instead of them, All CASUALITY and continue variations are needed , in order to avoid errors of summing, and thereby prevent zonale defects or astigmatism..
Otaining the best spherical cap is due for the effect of statistical law, or the law "of large numbers".
And this is understandable when you consider that a mirror can not be achieved by means of only a few strokes of great mechanical removal (which therefore may all be performed with a machine tool). On the glass instead you must perform a multitude of sanding strokes, each of which removes only an infinitesimal amount of glass.
Therefore this large number of strokes may well observe only a general principle enforceable, that is to NOT start or finish NEVER those strokes all in the same place (as would a machine tool), since for precise that they can be the machining passes, They would still have a minimum tolerance of error, which error would always add up to the same spot mirror, that is, points in the start or end of a stroke. Generating an optical defect definitely increased far above the minimum tolerance peak / valley 68.75 millionths of a millimeter, that represents the "entry level" quality of a mirror, just acceptable for optical telescope.
The truth then is that due to the statistical law, an error acidentally randomly positive and one randomly negative, elides or cancel out.
After reflection on randomness which is the basis of the manual processing of the mirrors making, resume the tool manufacturing:
I continue then drawing in pencil on the tool glass, the position of each square of pitch, begginig from that wo have inside the tool center, but off-center of the square, to avoid any possible symmetry.
Drawing the parallel network of all the other 20 squares×20 separated by furrows 10mm, and from that drawing result that to garnish my tool with squares' pitch 20x20mm 10mm thick, I need 61.
In order not to unnecessarily put in game a quantity of pitch greater than what is needed (since it is known to splinter at the slightest bump, then sticks on anything that has a temperature above the 30 degrees); calculating the volume of the necessary quadretti, and the package purchased, to see how much of it I have to melt.
The volume of a picture is 4 c.c. the number of squares needed to garnish my tool is 61, but since the silicone mold rubber I prepared that would produce 81 I decide to melt the quantity to complete the mold, ie 81×4=324 c.c.
The purchased package pitch (Gugolz n ° 55) It is a cylinder of cardboard in which the product has been fused. The cylinder has a diameter of 95mm x133, and therefore has a volume of 943c.c. ... .I will have to merge around a third.
I work in my garage so as not to damage with projection of sticky crumbs everywhere, and freed the pitch from paperboard, I keep it on an old pot and beat gently with a small hammer to break a third of its, making the pieces fall into the pot, crumble it Additionally in to the pot itself, to speed up the subsequent fusion.
Scaldo the pan on an electric plate thermostated at the lowest possible temperature, Since the pitch melts around the 50-60 degrees.
In this operation, you must make aware and be careful that the solvents that evaporate from the pitch are highly flammable as the turpentine, so it is safer then not using stove with free flames, but rather a elecrtical heating pad.
The complete fusion takes time. Therefore the low temperature of the thermostatic heating, combined with chopping already done, and continuous mixing, They are provided to help ensure that the pitch does not go NEVER boil. Penalty massive loss of its solvent, which would make it too hard and inadequate to processing.
DIGRESSION THE QUALITY 'THE PITCH AND TOOL
The fact pitch must have the right "quenching".
The term "quenching" (derived from dark chocolate manufacturers) means hardness of the casting pitch cooled, such as to be able to yield only slightly, according to the ambient temperature in which you are working, in such a way as to ensure that minimum with subsidence, the continuous adaptation of the tool to the surface of the mirror.
But the pitch should not be saggy, otherwise the grooves on the tool would fill in a short working time, and that grooves should regenerate with continuous loss of coverage tool, which don't will last until the end of the processing of the mirror, but it will need to be redone, wasting time unnecessarily. The grooves between the pitch squares must always remain open and free to collect the volume of light dissolution which occurs on the working surface.
If you stop a groove and you don't shall reopen it, you undergoes zonal errors on the surface.
The advantage of buying a pitch black, instead of using a rosin (also called Colophony) It lies in the fact that the pitch black is sold in different gradations each with a certain range of guaranteed softening temperature.
While on the other hand the use of rosin, melting over 100 degrees, don't softens adeguately at the only friction temperature for processing, and therefore must be experimentally additived of beeswax, or turpentine, or linseed oil, to lower the temperature to the values reachable by friction in our environment during processing.
This experimental search for the right temperament is complicated by the fact that the rosin is a natural product “raw”, and as such has melting temperatures and variable density, and then starting from this raw material with uncertain characteristics, experimental tests are multiples, complicated and significantly slower.
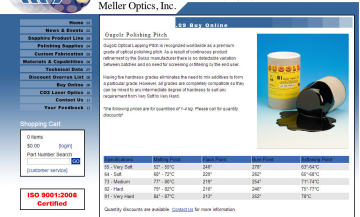
In my case, despite having had complimentary with the abrasive product and the blank, a generous amount of rosin, I preferred to buy the Swiss pitch black Gugolz, gradation #55 which corresponds to softening at 50 C° suitable to work with ambient temperatures of 18-20 ° as my in Winter, without having to experiment any mixing.
End of digression on the qualities of pitch.
RETURNING TO COVER THE TOOL:
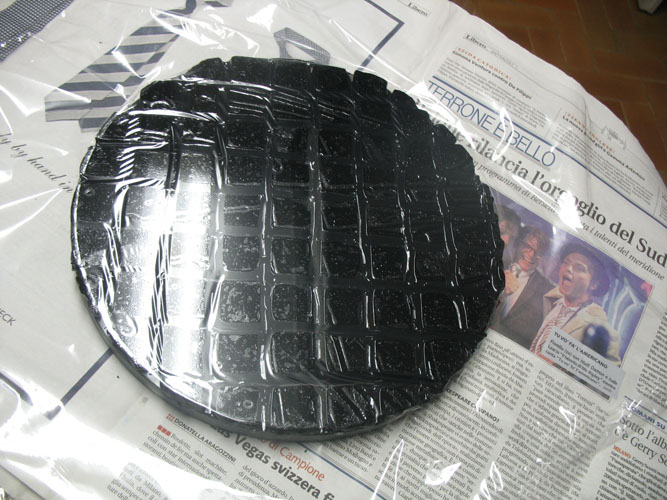
Once melted, pitch is poured into my mold silicone filling well all the alveolus: And the squares are ready.
Today is the 6 February 2009
I use a candle, and expose one side 20×20 of each square, for a few moments in front of his flame (but not in contact) for rammollirlo. Each picture is then made to adhere with a slight pressure, in its box drawn on the glass tool.
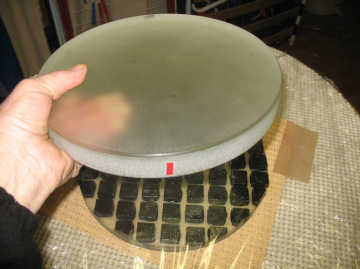 Zooming in, the tool shows the finished surface of the pitch squares with the wood grain imprinted served to make the silicone mold with which they were produced.
BEGINNER'S TROUBLES AND DOUBTS on the combination of temperature environment / vs. Pitch hardness, SUITABLES FOR MIRROR MAKING
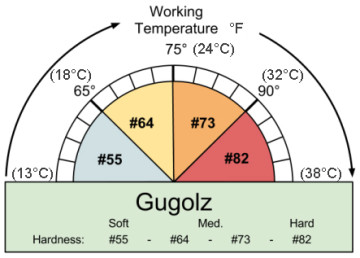
At a distance of six years, today, in 2015, I can say that doubt of that time would not have arisen, through tables such as the following picture,
that provide (although originally only in degrees Fahrenheit) of the appropriate processing temperature range to a certain type of pitch.
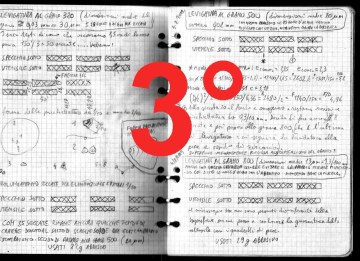
But at the time of my work I wrote in my diary the following construction:
We are in February and in the laundry room where I work the temperature is 18 degrees. Not many. The question is: Will its be sufficient degrees, to soften with my work of friction, on pitch Gugolz # 55, that for characteristics in his catalog, softens at about 50 °C? On this topic you read a lot of news on the Web, but often lose sight of the practical side, to get lost in philosophy. So I think I have to accept the pitch I chose and cha has the least degree of trade softening, trusting critically and seeing the progress of the work.
Nevertheless, basically I'm an engineer, not a philosopher, and if there are technical things to understand, to make my case….
For it is written that the testing of the pitch hardness is done with his thumbnail:...... For me too empirical.
It is written that is also made with a ball pushed against the pitch by a weight ... in a manner similar to the Brinell hardness test ... ..Let's see:
The text (2) pag.106 (look at first diary part) , says that the imprint left by a 8mm diameter steel ball at 22 ° C temperature, pressed against the pitch by a weight of 200g for 30 ", would leave an imprint between 1 e 2 mm depth; if the impression was deeper pitch was too soft, Conversely, if less profound, too hard ...
I do the same test but with a steel ball Ø7.87mm, the same weight of 200g at 17 ° temperature at which I am. The first problem we encounter is the inability to measure the depth of the depression created by the small ball.
And I also wonder how they managed to measure the depth of a deep cover (from 1 until 2 mm) seen that the error introduced by the dimensions of the probe of a normal electronic caliper, They are comparable to those of the depression to be measured.
I try to go back to the depth of the depression left by my steel ball , starting from the diameter of his footprint, with the help of geometry (and recalling the Brinell test): Depth H = radius of the ball – square root of (radius squared minus radius footptint squared):
My ball Ø7.87, He has left a footprint diameter of 2.33mm and the footprint has a depth (calculated with the above formula) of 0.17 mm…..
That is to 10 until 20 times less than the depth described in the book (although it obtained at a temperature 5 degrees greater): So my pitch would seem hard!
Vice versa I go back, with reverse calculation, the diameter of the stamp described in the book, starting from its depth denounced, I find that the diameter of the crater left would be 5.5mm: The ball 8mm would sink almost to its diameter.
And then I can only conclude that they are not convincents by the significance of the test, I can not repeat in 22 degrees, and then "soprassiedo" (..postpone), I am going on with my pitch as it is.
NOTE: Years later, today for those wishing to explore the use of more easily available rosin, (also called Rosin or colophony) which, however, it can not be used as such, but it needs to be woven into the lower right in “"Temper"” of its too high softening temperature, are available more information. In this blog you can read about this interesting theme items such“Hardness Test Pece” e “Melting and Casting of pitch“.
PRESSING THE INITIAL FORM
I put the tool on the table with the pitch facing upwards; I cover with a transparent polyethylene film kitchen, and I'll put in contact with the mirror, with ballasting weighs13kg.
Since the first compression should last at least 30 minutes, At end of this time I remove ballast and mirror and I see that there are still many squares of pitch not in contact (You notice when they are in contact that their black color prevails on translucent polyethylene, that instead traslucent only, shows absence of contact); I think my pitch is tough, and remit mirror and adding a ballast “warm water bag” at 40 ° ... This time compression and softening is excessive with squares perfectly in contact, but wide grooves reduced to 6mm , coming from 10 Original.
The displeasure of having exaggerated, I am heartened, however, that considering the two "extremes" met, the middle way will almost certainly be the right one,.. And then apply the middle redoing compression at 17 ° but without the Warm water bag, and for a time the 50% greater, ie 45 '.
After the 45 minutes I find that the squares are all perfectly in touch. But I decide that's enough for today. And to continue this will be discussed tomorrow.
Work Time = 6 hour
Total time work = 14 hour
(Following the fourth and final part)
