The spherometer is a measuring instrument used in the machining of an astronomical mirror, to verify the depth of the sagitta, and then the radius of curvature of the surface under examination.
The instrument itself is not complicated, It's consists of a rigid supporting structure on which are placed 3 support feet arranged so as to be located at the vertices of an equilateral triangle, and in the center is positioned a screw device or a dial indicator to measure the depth of the excavation.

Knowing the radial distance from the 'central rod legs and the measured depth, you can, by means of suitable mathematical formulas, back to the curvature of the surface of the radius value.
The mobile measuring rod, If screw type system, is generally fromed by a screw whit lead equal to 1 mm integral with a graduated disc having 100 divisions, which then allows a reading of the extent of the order of hundredths of a millimeter.
The three feet instead, can be formed by sharp rods, or three spheres of known diameter. The substantial difference between the two solutions lies in the different formulas that must be used to calculate the final result.
In particular, the formulas to be used are:
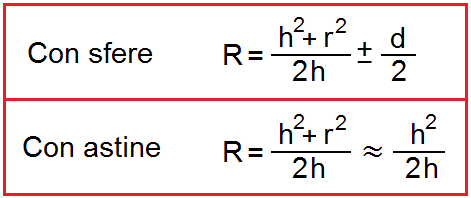
being:
R = Radius of curvature of the surface (2 Sometimes the focal)
h = measured value of the sagitta
r = radial distance from the central srew-legs
O = Diameter of the balls used
The ± present in the formula for calculating the radius of curvature for the spherometer with spheres it must be understood as a sign + if it is analyzing a concave surface, While as a sign – if it is analyzing a convex surface.
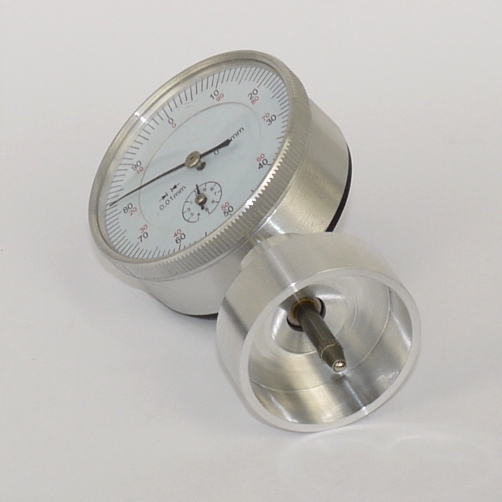
Another variant of the instrument is shown below, in which instead of the three bearings is a tubular cylindrical section. In this variant, if you analyze a concave surface to rest on it will be the outer circular ring, while if one analyzes a convex surface to rest on it will be the inner ring. It will be important, therefore, to use the correct radius value (r) in the formula, depending on the case.
HOW TO USE IT
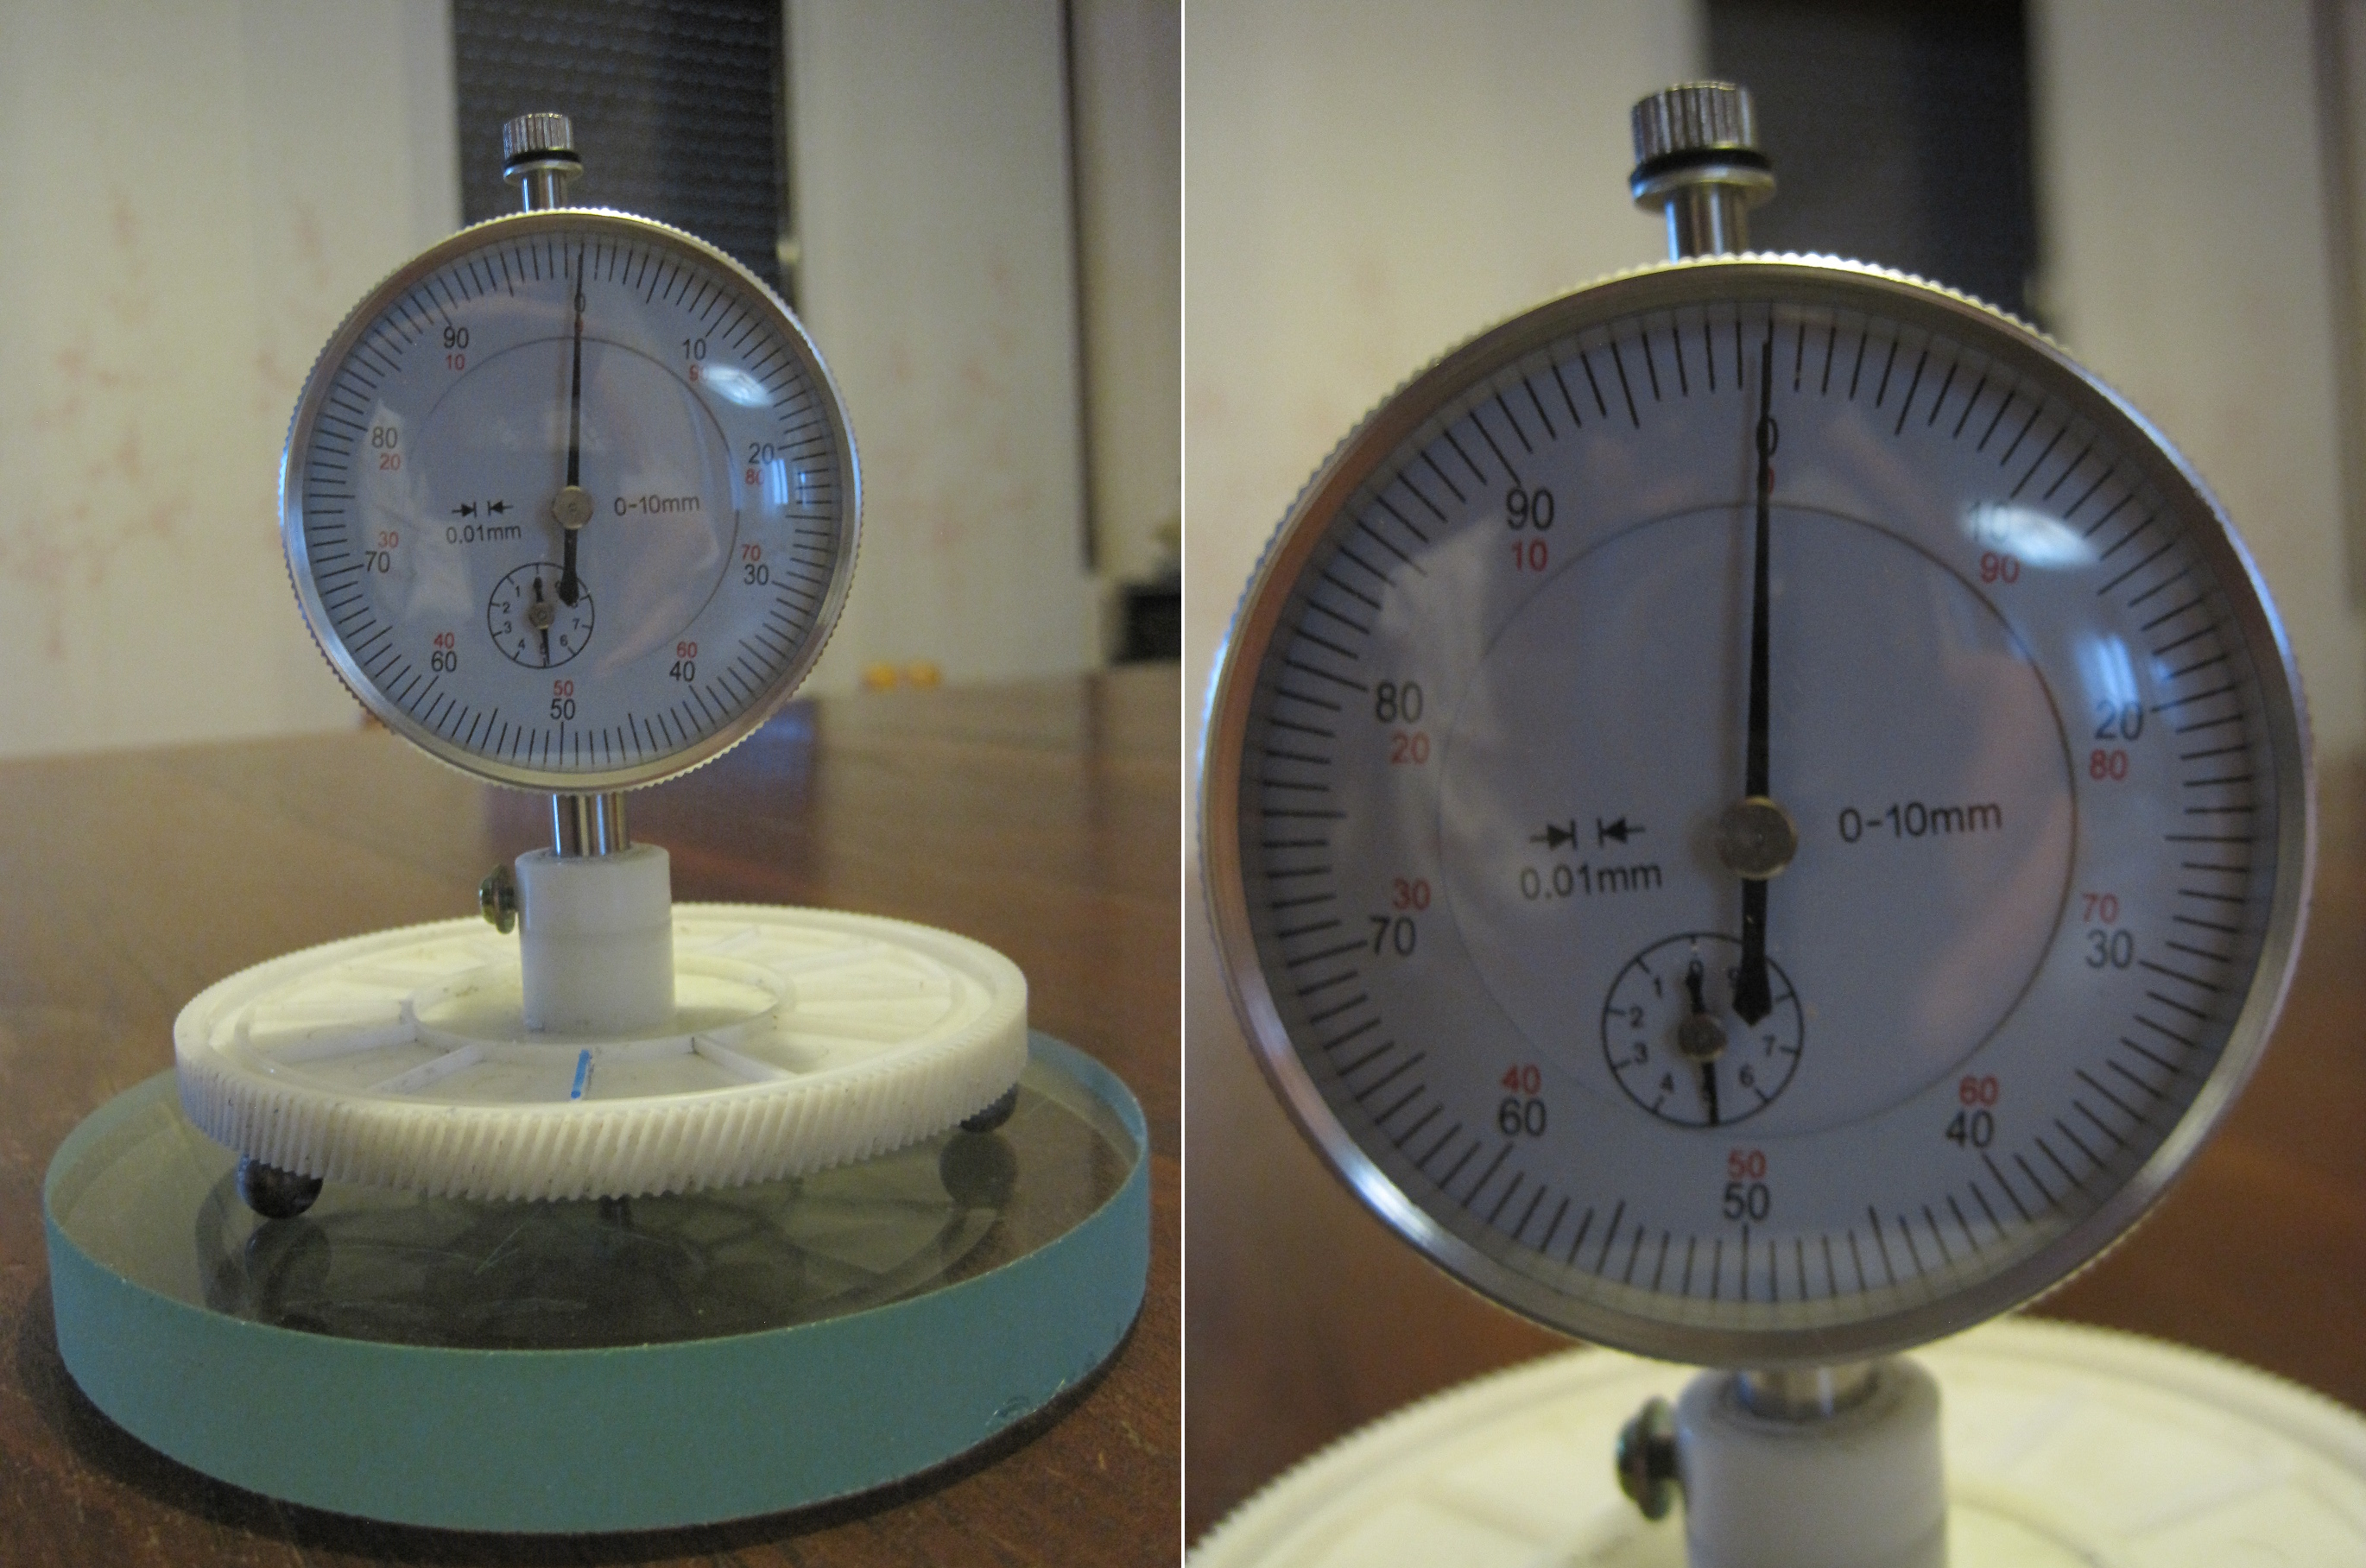
- The first operation to perform is to verify the zeroing of the instrument going to making a measurement on a flat surface.
- Proceed with the measurement of the surface to be analyzed.
If you have a spherometer dial indicator measurement will take place immediately and and without fatigue, while if you have one of srew spherometer, you should turn the screw to get it down until its tip comes in contact with the surface.
The techniques to figure out when the contact occurred primarily 2:
In the first, Once you get in contact and you continue to turn the screw, the entire spherometer will tend to rotate on itself, then return back slightly until it reaches the ideal position (sensibility 3-5 cents mm); in the second, if also just slightly exceeds,, the value of the sagitta, one of the legs will detach from the surface of the glass. If pressure is applied alternately above the supporting feet you should feel a ticking (as a wobbly table), then go back up to the disappearance of the effect (sensibility 1-2 cents mm).
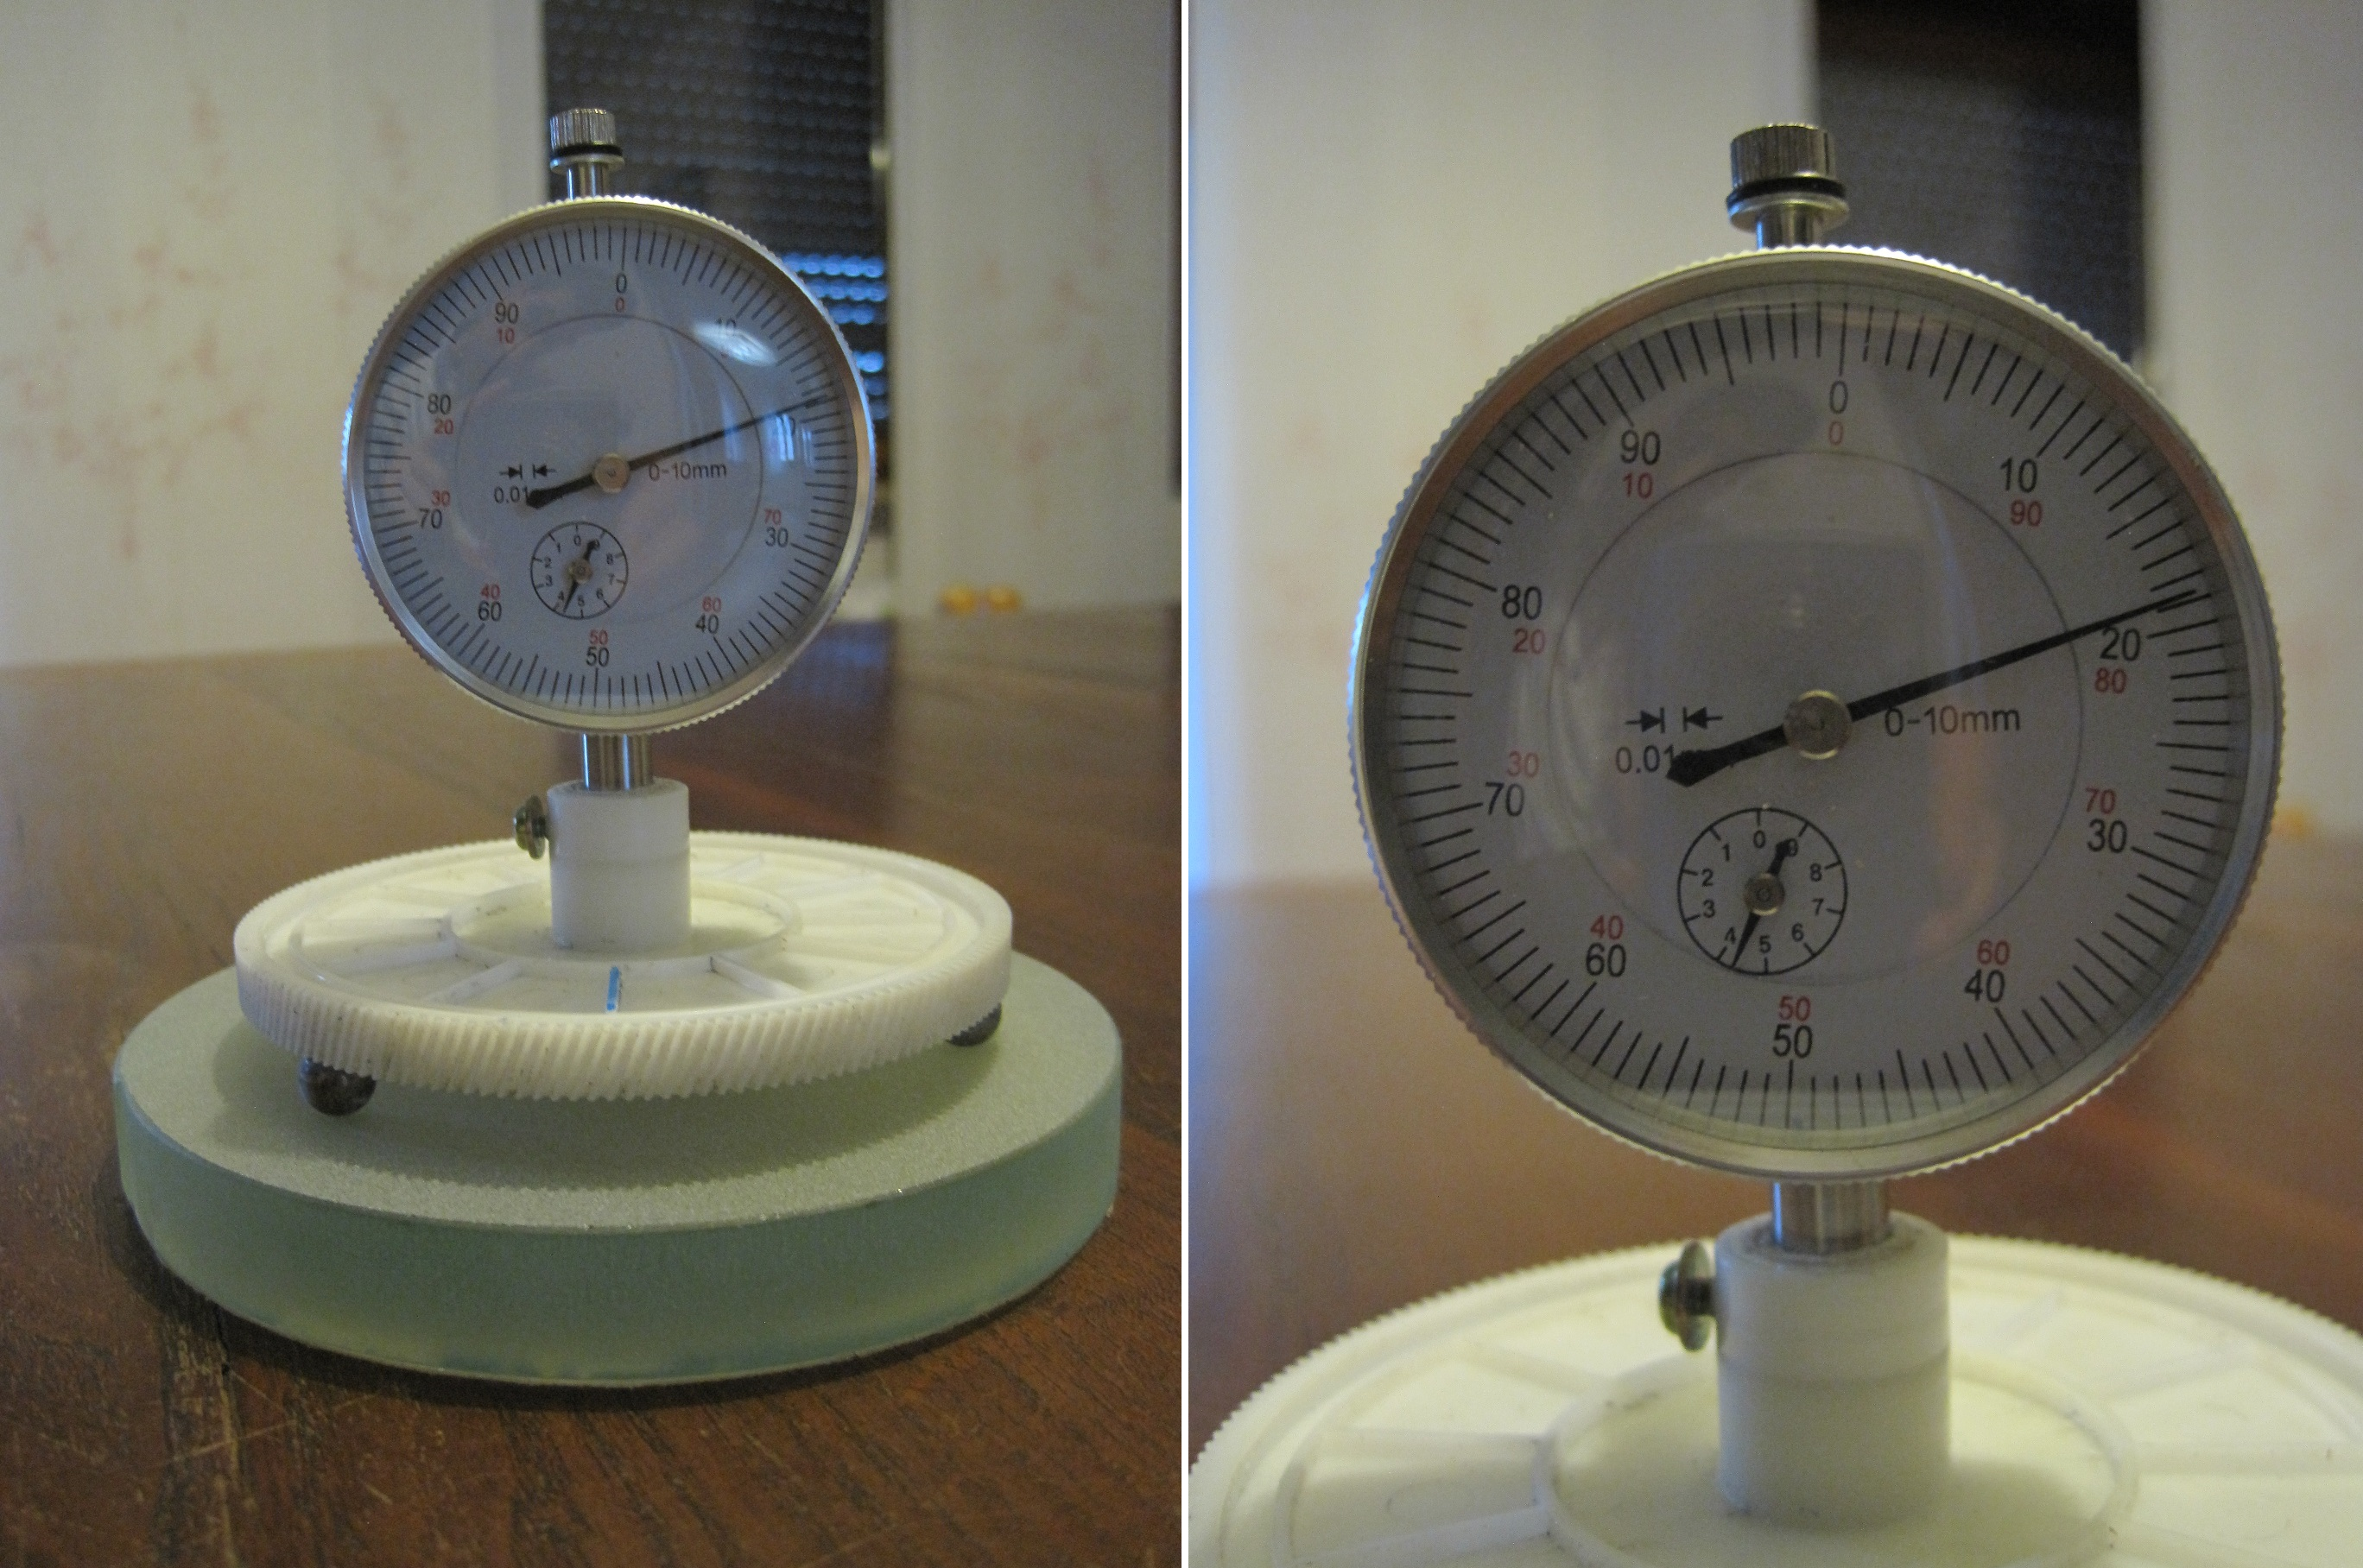
- At this point read the measurement and using the correct formula to calculate the radius of curvature of the surface (or focal dividend 2 the result).
Nell 'example given the value of the arrow is just over 0.81 mm (being the concave surface of the dipstick is decreased with respect to the zero position, then the pointer is moved in a counterclockwise direction).
Applying the above formula, the result of the radius of curvature (R) totaled 920.6 mm (having the spherometer under examination r = 39mm and d = 7.95mm).
EXAMPLE OF ONE SPHEROMETER autocostruito:
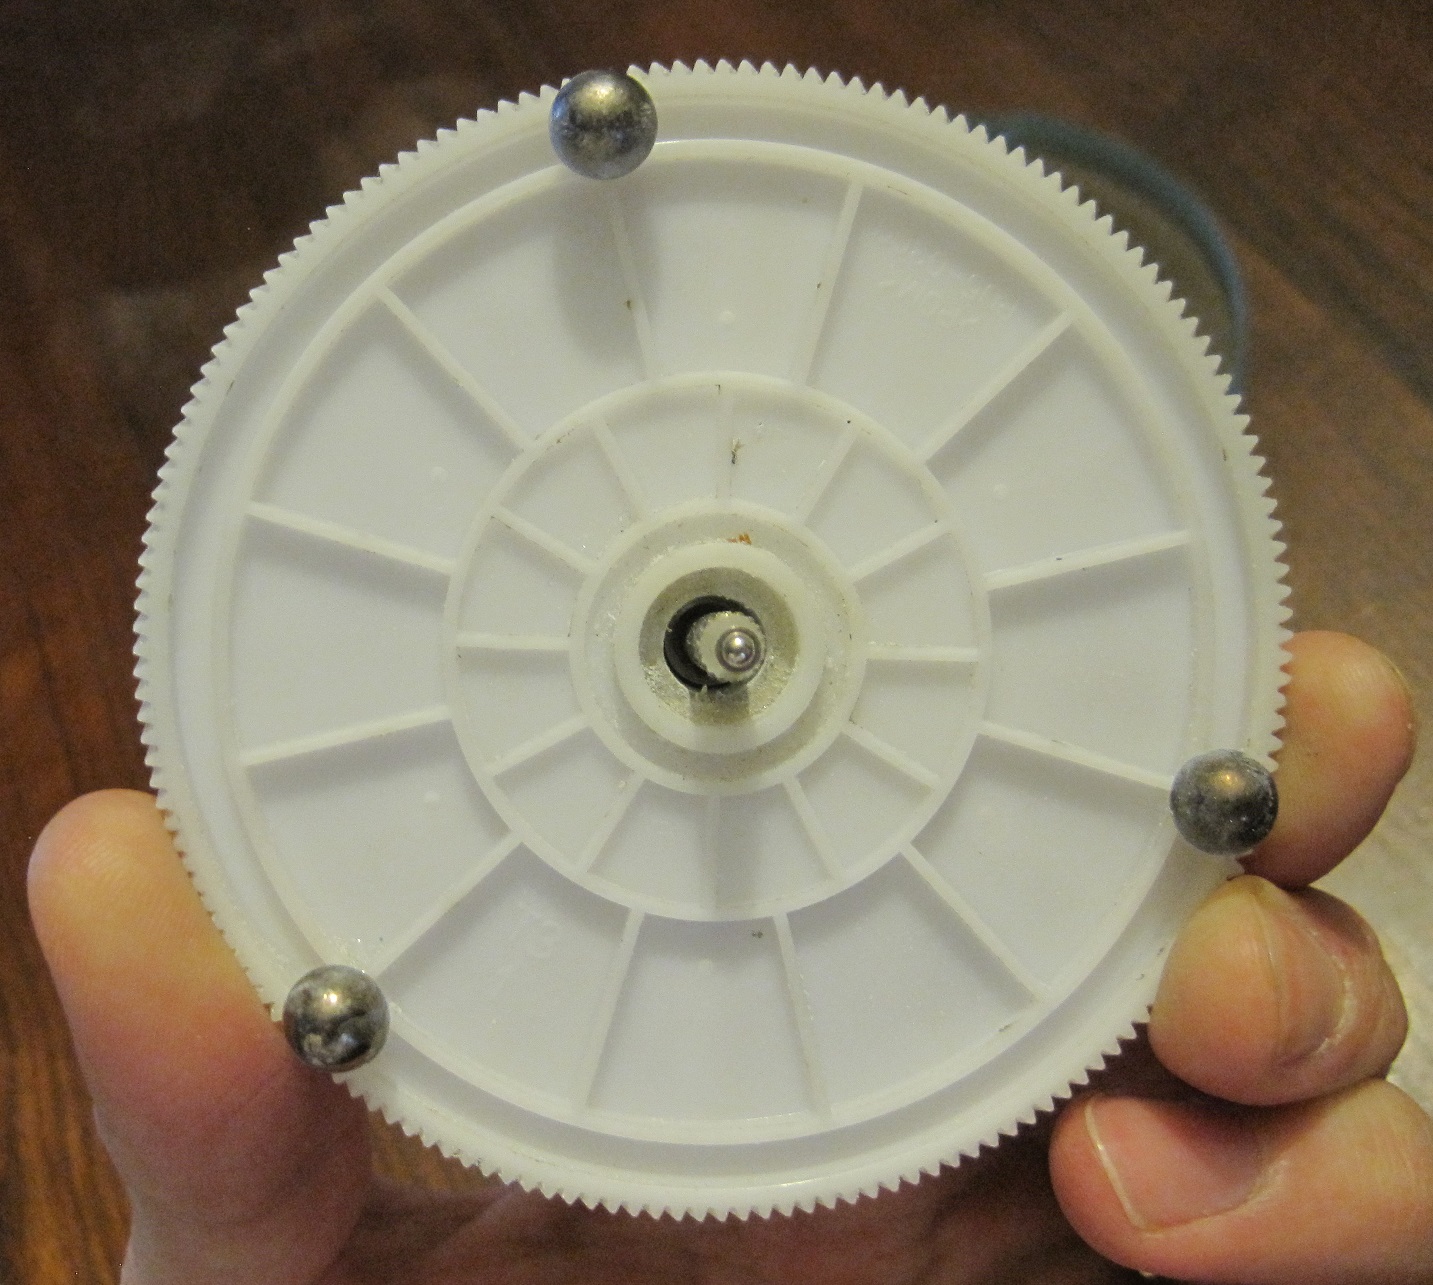
For the construction of this spherometer I used as a base of support in a fairly sturdy plastic gear and of appropriate diameter recovered from an old copier..
I have used this support because as you can see from the image below has a circular area on the outside of delimited by two edges that allow me to position accurately (at least to the radial level) the three spheres of steel support. Is 12 radial ribs that allow me to easily place the beads at 120 ° to each other.
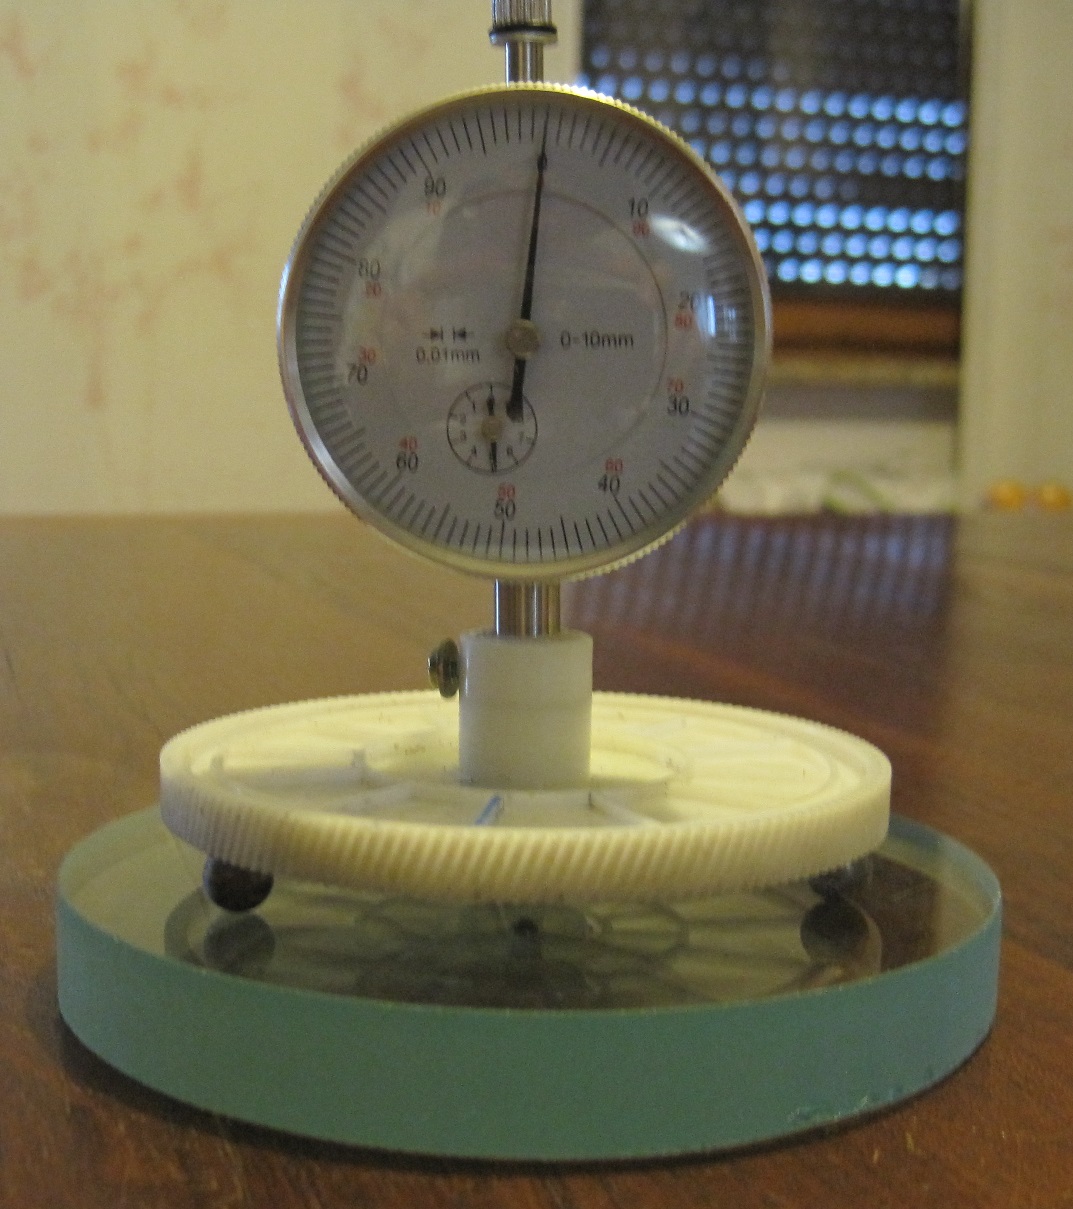
To lock in position the comparator instead, it's drill a hole of adequate size to allow passage of the outer Rod cursor that has been clamped into place by a transversal screw.
And this is the spherometer competo positioned on a flat surface for zeroing:

deabu
Giulio TiberinI