Forum Replies Created
-
AuthorPosts
-
Hi Massimo,
after a few work sessions you can already notice the first changes in the figure.

I did 4 hours with decentralized runs(tool center passing through the circumference change curvature) and then I compensated with W runs for approx 1 hour(I don't know if it's enough to make it uniform).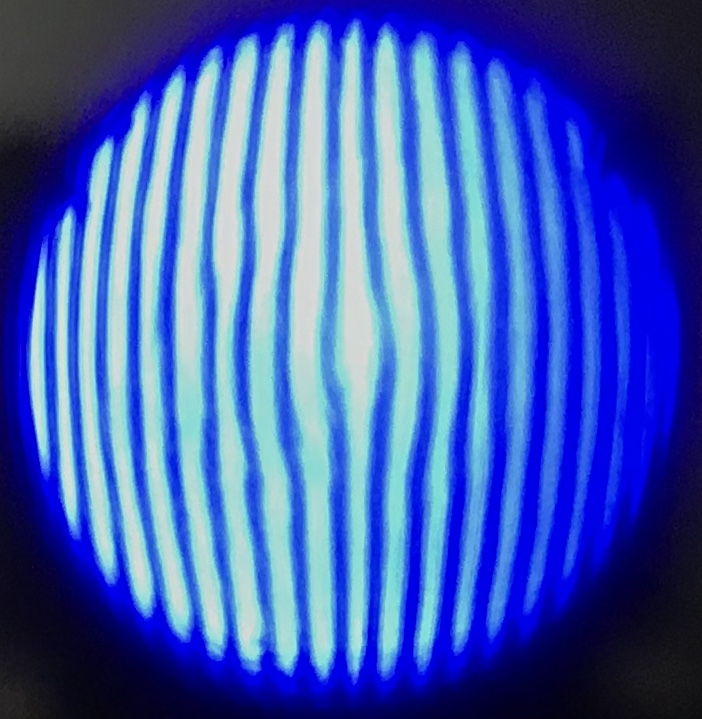
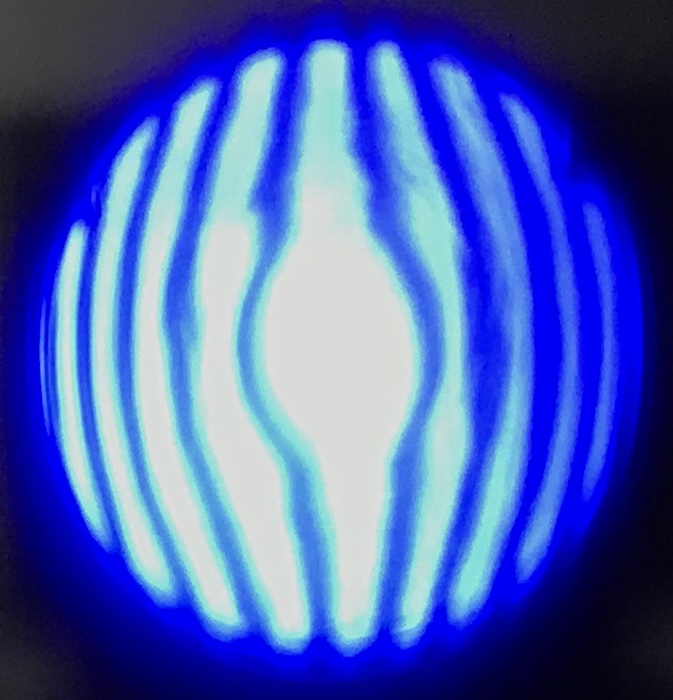
You can see from the photos that the hole has shrunk even if just in the vicinity of it you can see some imperfections in the lines.
Maybe I should insist more on W runs to even out again?
As for the curve change line, according to the photo I should move towards the center of the right mirror?(even though I was convinced that I would progressively move away from the center)
Or I still insist in the same work area for a few sessions?
I'm getting lost!

Luckily I wrote otherwise I went on like this for others 10 sessions.

Sure that, you too… something easier to start with no ?


Massimo, I'm not someone who likes to win easy… it's part of my nature, unfortunately I always look for difficult things to do.

Advice: treasures these issues because this is the essence of Grattavetro, understand mistakes and know how to correct them, but until you try them on your own skin you hardly learn anything. Who does not find himself dealing with these problems, he's not good he's just lucky.
In fact, the best thing is to experience them on your own skin.
Now I just have to put into practice what you advise me hoping not to make disasters.

We'll see what comes out.As soon as I have some results I update and let's see a bit.
Thank you.
See you soon.
Luca
I also forgot this particular here, I don't know if it's important but I'll add it anyway.
To run the tool over the glass, I got some big suckers, they are also convenient for me because every time I arrive at the dryers and have to detach the tool from the glass, I use them as holds, same thing when I have to reposition it above, given the size of the tool, I avoid damaging it by placing it abruptly.
Probably during the execution of the strokes I unintentionally transmit a little pressure in the central part of the tool, god!
However these days I will also try to do some sessions without touching the central part and let's see if anything changes.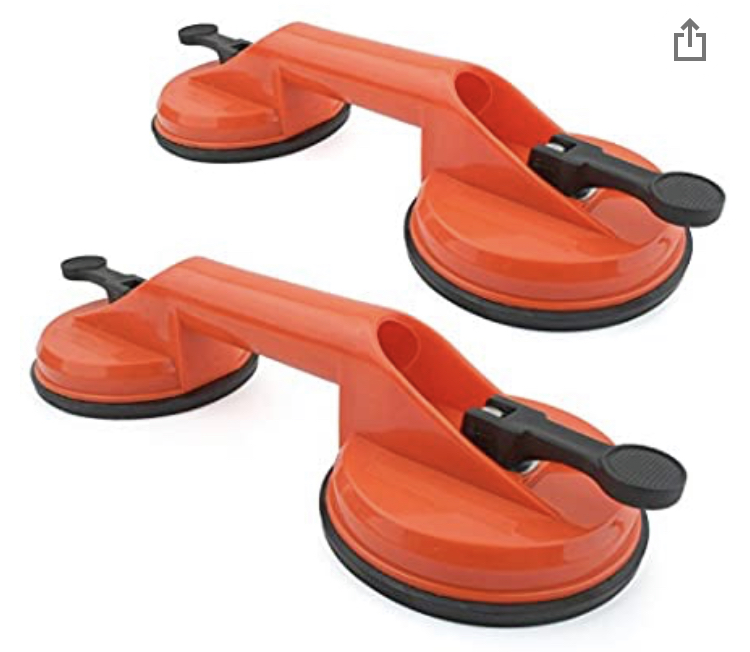
However, I update you!
See you soon.
Luca
Let's see if we can build a good sphere, in case you can change your strategy ...
For the (good) sphere to reach I really hope to find the right path!
In the meantime I have built myself a new Ronchi test that is much more precise, so I also made sure that the glass did not suffer from astigmatism.(Even turning the mirror by different degrees, the image remains the same).
Meanwhile, I update you on some work sessions carried out with the new plaster tool.
I state that I was not able to get a good fit right away, to get all the pieces to touch I also had to resort to micro adaptations, however in the end it seems to me to have gone.
Compared to the last Ronchi posted, there is clearly a general improvement in the figure, albeit slightly.
The mound that was previously noticed at the edges of the figure is now no longer there, instead the hole in the center remains.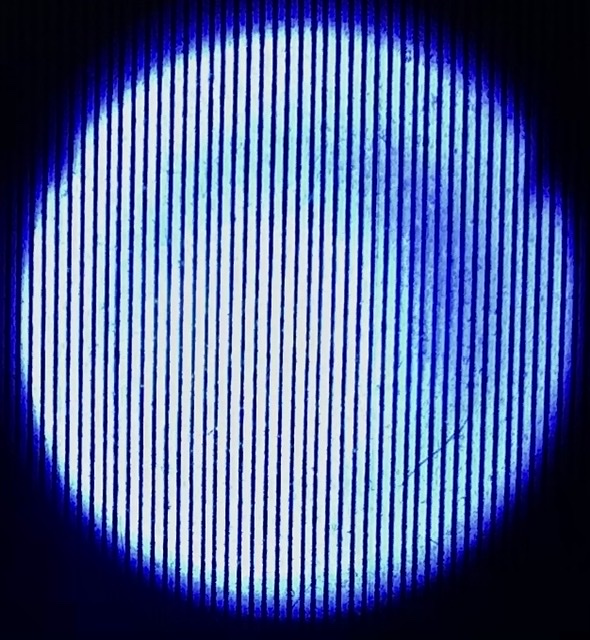
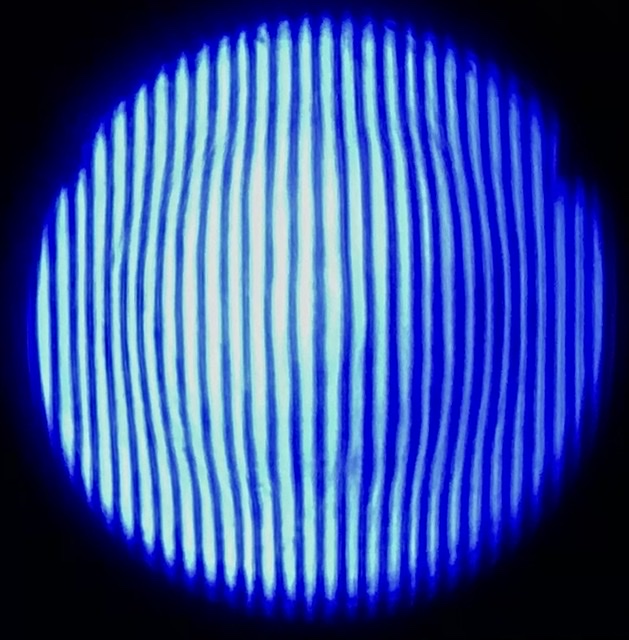
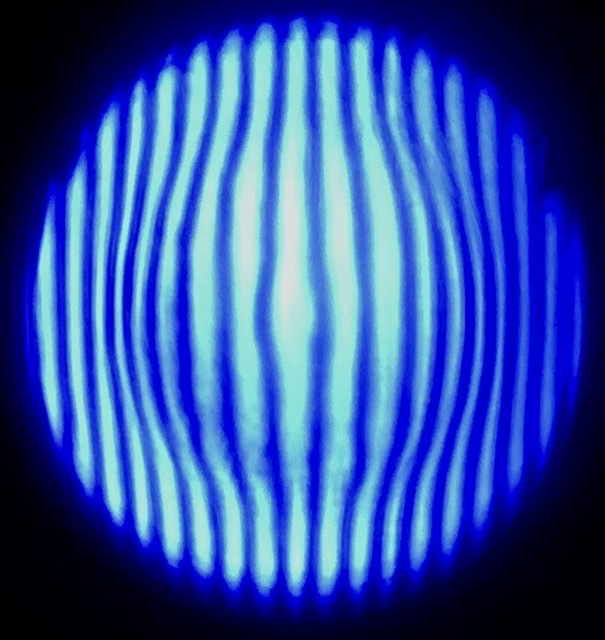
So I chose a fixed distance in the Ronchi test, I performed new polishing sessions always with the tool above( it is known that the tool above removes 70% in diameter from the edge without touching the center)I double checked with new Ronchi and nothing, the figure always looks the same to me, hole in the middle.
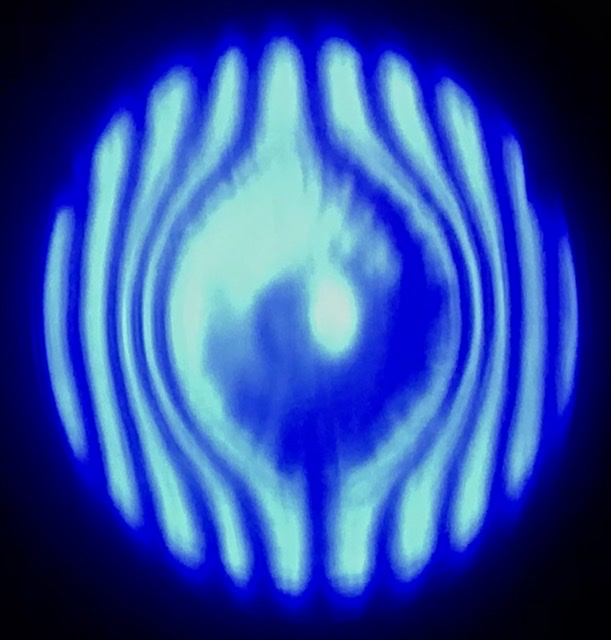
I also tried to turn everything by putting the mirror on it but already from the first sessions I saw that the central part got worse and was even more dug, so I put everything back as it was with the tool above.
At this point I feel a bit lost, i need some advice (probably also of Ariadne's thread), I don't know if it is appropriate to go ahead with the tool above hoping that something changes.
The paradox is that despite the insistence of machining with a tool above the figure, it does not move one iota, it is not strange?
At first I thought the hole was too deep to be reached with 2-3 hours of work and that they were not needed even more but by now I have reached the 16-17 hours should see some change instead nothing, instead the little hill that was on the edge disappeared in two sessions of 1 hour.Any advice is welcome.
Regards
Luca
But ... it wasn't supposed to be an F4? I remember badly ?

From the beginning, the focal length chosen was an F3.
It is a more than difficult goal, it is well known,but now I'm in the dance I can not back down.

I have to finish this mirror!!
To return to the starting focal length I would have to correct approx 5 tenths of excavation.
If we consider the fact that the mirror may have astigmatism, I would still have to step back and go back to abrasives.
What do you do in these cases?
It is wiser to go back or continue hoping to finish the job?
Ciao

Well then I understand that I have to grind the whole tool to the new dimensions.
This is not a problem since I still have to do the plaster casting.
As for the focal length, I had chosen an F3, saw the question asked I took a look at the radius of curvature, now I find myself a measure equivalent to 230 cm.
If I have done the math correctly, my radius of curvature should be 246 cm so I'm out of 16 cm, this can lead to problems at the end of the job? ((410 mm X 3) x 2)
Otherwise I had thought of adapting the new focal length to the whole initial project.
It is feasible?
Another doubt that I am pestered by is always that cabbage of astigmatism.
I would like to do another different test to avoid the doubts I have, alternative al Ronchi?
I apologize if I seem too talkative but given my poor experience in the field I would not want to go on with polishing and then find myself having such a problem at the end of the job.
Regards.

Luca
Unfortunately the effect of a sudden rise in temperature, I experienced it during one of my creations, and it wasn't pleasant at all
Bad adventure, I'm so sorry

If it happens to me, I'll kill myself
So I have to redo the tool in the pitch of 41 cm?

If I go ahead with a tool smaller than the diameter I don't solve?
I was convinced that a sub-diameter was enough for polishing
See you soon

hello Giulio,
All these details are very interesting, these are variables that I will certainly experience as soon as I have a well-adapted and stable tool available.
By the way, do you think we can recover the dowels of the previous tool which, among other things, are also partially adapted?
I don't know if it's feasible, maybe trying to detach them in some way.
Otherwise I'll have to redo everything
The plaster that I have now ordered is defined as extra-hard .... it will certainly reach high temperatures, I tried to ask the dealer but he couldn't tell me exactly what temperature it reaches when drying, so in order not to risk breaking the glass I will use a cast of the curve of the glass made in concrete that I had aside.

See you soon

thanks a lot

Use an overflow of 1/6 of the diameter part by part or use an overflow of 1/3 of the diameter part by part?
So I used the classic race 1/3 of diameter COC.
But consider that the tool is not a full diameter, is approx 35/36 cm in diameter compared to the glass it is 41 cm, I don't know if the same rule applies in this case.
At the limit, as soon as I get back to work I try to run races that only touch the edge of the mirror without coming out of those 3/4 cm
Thank you

The plaster I used had kindly given me as a gift, my dentist's lab technician, and I can't tell you what brand it was.
Unfortunately, I had already placed the order when you answered me, so if what I got does not go well, I will use yours.

So I tried to redo the Ronchi to rule out the doubt that there was astigmatism.

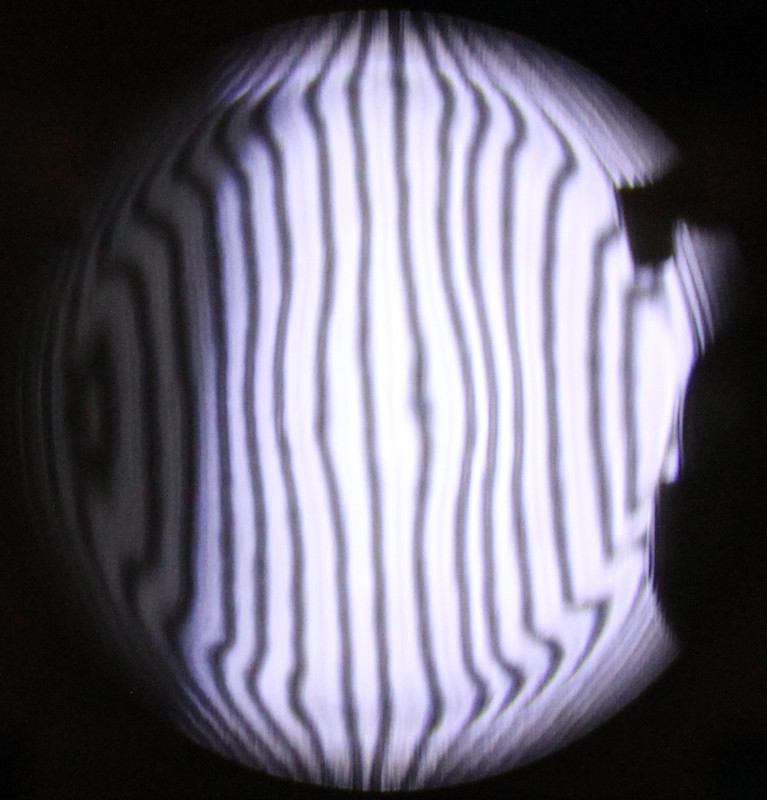
However, a minimum of displacement in the light beam is enough to end up with a completely out of test image, in the future I will do something more precise.
I had also tried the test using a laser… I couldn't .
.
I must also say that the tests presented previously were not so reliable since I took the image projected on the wall at a distance of 1-1,5 meters from the reticle.
As soon as I have the plaster available(prox. week) I proceed to redo the tool so we can see if the adaptation remains stable, and I try some polishing sessions as Massimo advised me to erase the defects found.As soon as possible.

Thank you
Luca
So the outcome of the tile glue did not go very well, I would say really bad!
Later, after 48 hours of drying is still very fragile, so much so that it is possible to create grooves with the nail, perhaps the ideal would be to dry it
As for dental plaster, you have a few brands to recommend to play it safe?
These can be fine?

ADVANTAGES OF SYNTHETIC PLASTER
Very high hardness and resistance of the products
Very low expansion
Free from linear shrinkage
Biological safety due to the natural derivation of the various components
Biodegradability of the obtained artifacts
Adaptability to industrial or infant processing
Molecular structure of the finished product similar to red brick
No need for drying or cooking
Low thermal reaction peak around 30 ° C
Very high reproduction accuracy
Possibility of mass or surface colors
Physiologically non-toxic
Possibility of polishing the finished product with the brushes
Possibility of galvanic bath finishes
Utensils washable with waterCHARACTERISTICS OF SYNTHETIC PLASTER
Appearance: brick red powder
Mixing ratio: 1kg.(plaster):280 ml. (water)
Processing time: 10-12 me. c.a.
Solidification point: 15-20 me. c.a.
Time of demoulding: 30 me. c.a.
Brinell hardness: >300 N/mm²thank you.
See you soon

hello Mirco,
Yes, I poured the glue directly onto the glass, now I'm waiting for the drying given the thickness I gave it (3-4 cm).
I'm not sure if the glue does its job well, the mixture is very grainy and if one of those grains comes off during polishing, I despise all the work done so far, I'm not sure I can stick the pitch squares on it.
I update you anyway.
It had been recommended to me by Giulio many posts ago even though he had anticipated that he had never tried anything like this, so it remained an attempt to alternate with dental plaster.
Meanwhile, I found it on Amazon this dental plaster, e this,they should be fine given the declared resistance (800 Kg / cmq), for the temperature it reaches during drying it should remain around 30 °.
The detail of the blade of light had escaped me, I have to double check it, I thought it was not important.
The thing changes instead if you see them rotate, or change inclination from intra to extra.
in the sense that I have to go back to grinding?

See you soon

hello Mirco,
I don't want to say bullshit but it seems to me that the lines are slanted to the right in both extra and intrafocal.

To be clearer by looking at the posted drawing, they are like the image on the left.
To be sure I should repeat the Ronchi.
In the meantime, I'm building another tool, I poured some tile glue on the glass and let's see if the tool does its duty this time, then if the surface allows me I intend to stick on the squares in pitch .
.See you soon

Hi Massimo,
Thanks but I don't feel like I've been that good given the time it took to achieve just enough results.

Since wood does not represent a good rigid support, I will have to look for something else, unfortunately, with aluminum I was initially able to find a balance of adaptation but in the end the blocks fell off and therefore I changed the support.
You usually do what you use to play it safe? Mirco had mentioned to me some marble supports.
In my case, I could get a very thick tile(2-3 cm) but I have to wait to get back to work.
I wonder if a good tool would correct even such a defect?
Sorry but from how I posted the photos you don't notice much but during the Ronchi test I made the lines were inclined by a few degrees on the whole dial.
See you soon

hello Mirco,
so the pitch I'm using is rosin mixed with a percentage of wax.
The temperature of the environment used fluctuates between 21 and 23 degrees.These first two images are in ExtraFocal
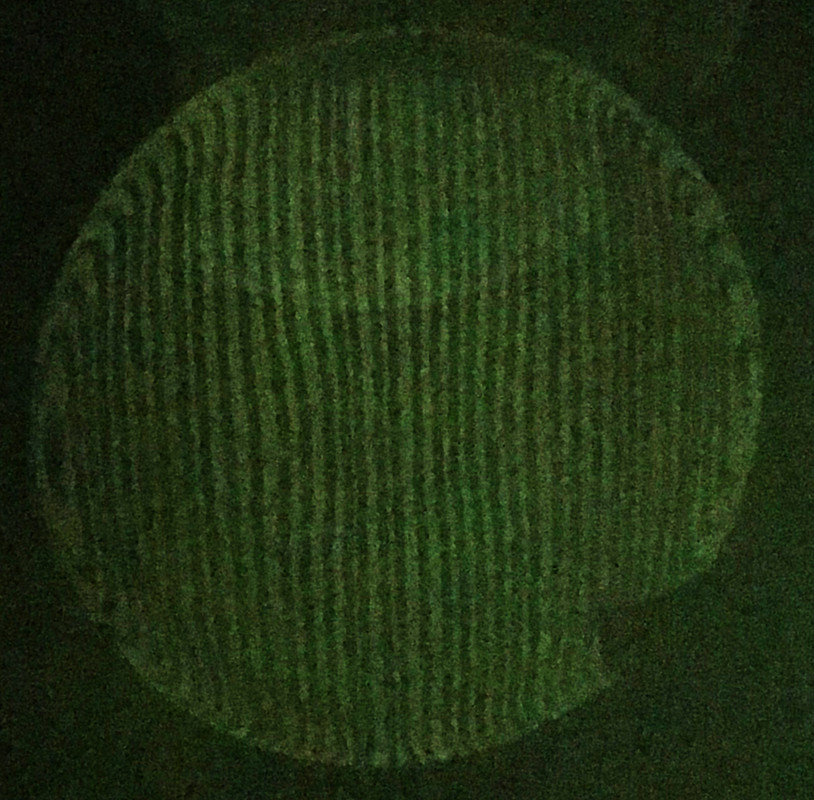
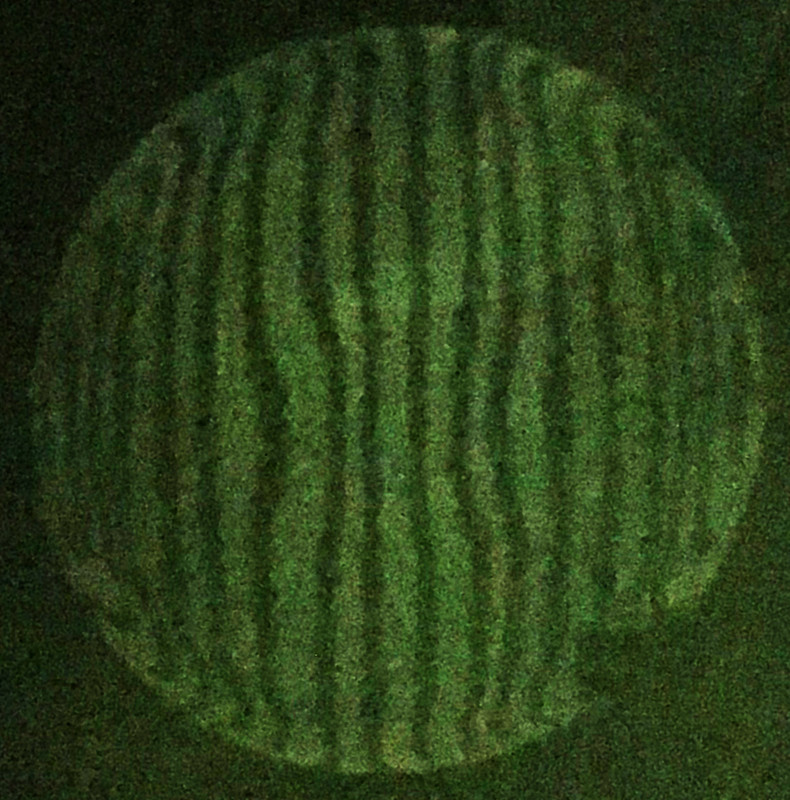
These instead in IntraFocale
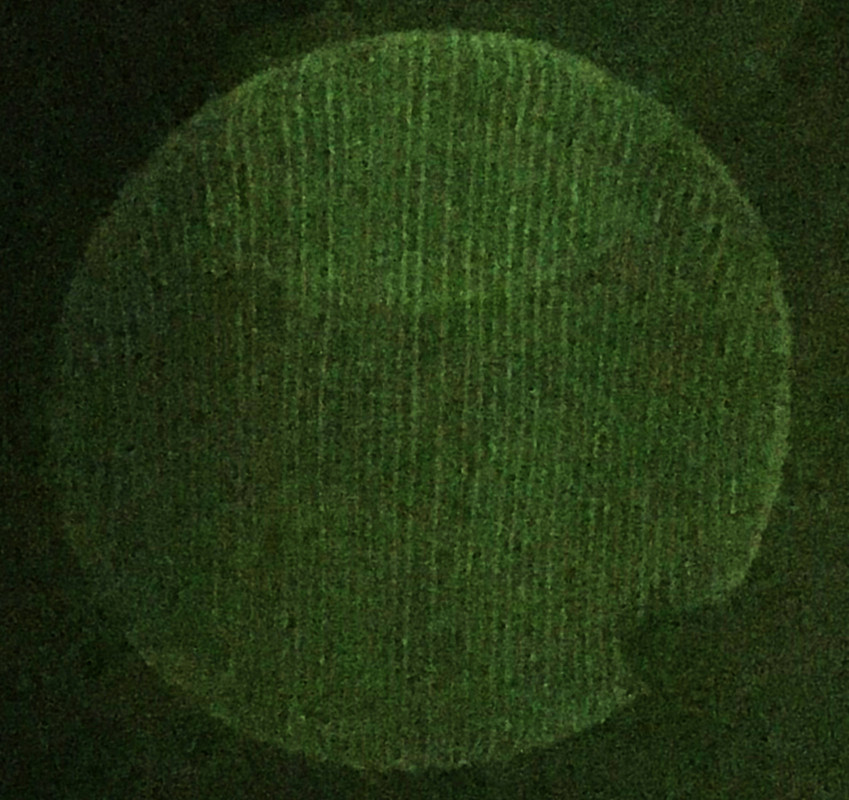
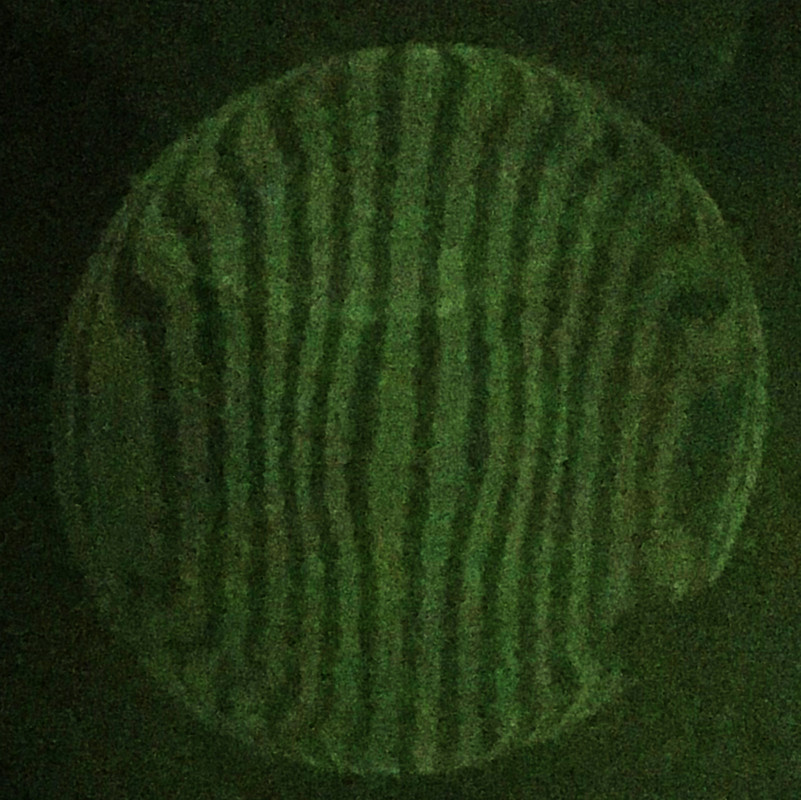
Referring to your post "Introduction to the Ronchi test" and looking at the images in intrafocal and extrafocal I find myself a hole in the center, plus the riveted edge(quite right??).
It was probably already like this or the tool is digging more in the center?
Also consider that the last three work sessions I performed with the tool above, according to the rule of the grattavetro I would have had to dig more at the edges
Any suggestions?

Luca
-
AuthorPosts