- This topic has 178 replies, 6 voices, and was last updated 4 years, 6 months ago by
Giulio TiberinI .
-
AuthorPosts
-
25 February 2020 at 12:47 #11685
hi Luca,
Glad to reread
I think the disc 10mm aluminum as support, will be fine, although I could not tell for sure if it is adequately drive. I have always found it very well or with marble discs (I cut them a neighbor, cost content but are very heavy) or with the dentist from plaster-plates, very cheap, beautiful rigid and lighter. I think the ideal solution.
To pitch, anchio at the time I had done a lot of evidence, it is not easy to find the right mix. But given his work, I would say that Max was able to find good mix, and the suggestion that you gave is great. Or if you prefer ready for use, Just buy the Gugolz.
Hello and see you soon
Mirco 25 February 2020 at 20:01 #11686
Thanks Mirco!

Right now I finished the tool.
I followed to the letter the advice Massimo.
We'll see how it evolves around now tomorrow.
I must say that this mix of ingredients has made me unprepared on some steps, but all in all it seems that the consistency of the dough is the right hardness.
I trust in your advice!
We update tomorrow on the results obtained!See you soon
 26 February 2020 at 12:44 #11687
Hi guys I upgrade work last night.
So the dough as I had already explained to me seems the right consistency.
But I need to do it all the cast because something went wrong.
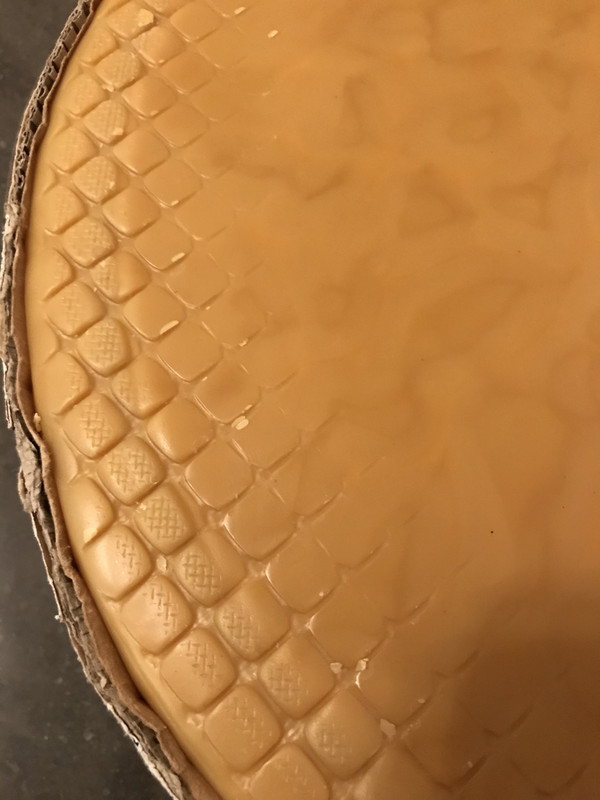
Maybe I miscalculated the times, I waited too long to rest the tool of pitch on the glass(for fear that the temperature was too high, causing the glass to break) and I got a complete tool only on the outer parts while the inner / middle part has remained smooth.
also I would tend to exclude the ballast used on the tool (20 kg), I think a more weight than enough and in any case I had already used once before and had gone well.
Considering that I go back to melt all the ingredients mix we must add back linseed oil and turpentine?
To create the pieces on tool structure I used a network.
But the work is finished in some places I just attacked causing the partial rupture of some piece.
I thought of lightly oil the network with linseed oil, risk of compromising the dough?Thank you!
See you soon!26 February 2020 at 19:42 #11688hi Luca,
Eeeee had happened to me. Look before you re-melt the pitch, try imnergela in hot water, as well softens a bit and you can try again to make the adaptation.
Anoint well as the network with the oil. 26 February 2020 at 22:05 #11689
And, the color of the patina now I like,
 It should be fine and I agree with Mirco, I would try with hot water. If the consistency / hardness is correct cold patina does not deform even if we go up on with both feet ( I did it several times
  ) But just heat it up a bit and you can not have a good fit. What happened to you it is normal, to the point that I, even more I try to give it the shape immediately after the merger casting, especially on a tool 30-40 cm.
Is’ hard to catch the right moment and most of the time is wasted effort because the patina temperature quickly cools on contact zones, and then you can not make them give in to what it takes, so then the real patina adaptation / mirror you get the warm patina .
Once you reach a Remix soddifacente, there is no need to add more even if it is melted again.
Besides the oil, as Mirco says, the network and also the mirror can be wet with soapy water to prevent any bonding.27 February 2020 at 15:07 #11690hello Geminimac
I understand your qualities of perseverance in the fervid imagination, I see confirmed, as well as by way of scratching with sandpaper instead properly with abrasive powder (creating multifocal astigmatism and furrows impossible to eliminate, Instead of the easiest point craters left by the dust), also on the type, shape and unusual characteristics of too small squaring; too shallow depth of the grooves unmaintainable open in processing; too small asymmetry of the tool grid into pitch you've accomplished.Yours are precious qualities that you can use profitably to invent other new ways, only taking as a guide the complete knowledge of the reasons that regulate the "old street" optimal realization of mirrors for telescopes. Street super-proven for more than a century of history astrofila, where technology has remained and still remains manual.
Only with the knowledge and respect of the many reasons that determine those “stakes”idispensabili, you face the chance of new experiments potentially ameliorative.
All that said, , potendoti not advise otherwise without quoting whole chapters of notions that are part of the old road, My advice is to get the 5 fundamental chapters: two for the "scratching of the glass” (chapters 2 - 2bis); and three for the design of a Cassegrain telescope Coude (chapters 6 – 7 – 8) with scalable measures to any diameter, because proportional to the diameter of the primary mirror.
They are fundamental chapters, with illustrations of the book by Jean Texereau, available for free download from this site: http://www.astrosurf.com/texereau/
Chapters that if you do not know French, You could translate into Italian using "Google Translation", choosing the language French origin, to be translated in the Italian, and then clicking on "Document", to indicate one at a time PDF chapters downloaded in French.
Launching the translation will have the translated text on the screen that you can save and print, But looking at the many figures on the original PDF.
27 February 2020 at 19:41 #11692Chapters that if you do not know French, You could translate into Italian using "Google Translation", choosing the language French origin, to be translated in the Italian, and then clicking on "Document", to indicate one at a time PDF chapters downloaded in French.
Or, more simply, you can find the same things here on Grattavetro, with translation of texts and videos from French by Giulio Tiberini


(Julius has written so many technical books and popular, and not only here on Grattavetro, it becomes difficult to remember them all even for the author…
 )
)Luca sorry, I had missed the grid, right Giulio… in fact it is too small and also the grooves must be more wide and deep to allow the patina to yield and conform to the shape, otherwise as I said before, It remains rigid even with application of a high weight, sorry…
28 February 2020 at 18:27 #11693Luca sorry, I had missed the grid, Giulio has reason ... in fact is too small and also the grooves must be more wide and deep to allow the patina to yield and conform to the shape, otherwise as I said before, It remains rigid even with application of a high weight, sorry…
@Maximum
I do not matter so much I had to get back to the work these are just attempts before achieving the right tool for polishing
Hello Giulio is a pleasure to hear from!

You really are a universe of knowledge.
That said, I set to work on all that I've posted but I only read the part about the realization of the patina and wall plugs.
Is it where I want it now and focus more do I need to see if indeed the work done has worked so far.
I must say that in the figures you see revving pitch with huge anchors and a big space to separate them.
I also had a look at your 3-d "tool with pitch candy", Also you see them provide a tool with large squares spaced at least 10 mm.
In 3-d Mirco rather I see use a grid with large spaces in squares, perhaps it would be a quick fix, I do not know.
I'll have to reorganize and study something new compared to what I had in mind.
Unfortunately in my case I do not think he could put on a tool with plugs attached, They are devoid of the second mirror-tool and create a plaster form as is suggested would require much more time.
But never say never!
As soon as I can I update!
Thanks for your suggestions

regards
Luca
15 March 2020 at 19:46 #11696Hi guys,
I do not know how good writing in such a dark period for Italy, but unfortunately I need to update the progress (negative or positive that they are) with regard to the tool in pitch.

In these two weeks I have made several attempts to provide a tool which as possible approached to the polishing work.
Initially I tried to make the patina using a grid a bit bigger than the one originally used but I failed miserably.
Then covering one of the videos in the post of Julius "tool with pitch candy" I tried to follow that road.
The author of the video (Gordon Waite)creates a cast of the leaching curve pitch above the mirror covered by a sheet of aluminum, after once solidified affects the forming of the squares.
Not having the second convex mirror worked I had to make me a thing, I used the tool in wood used for the processing and I have obtained the mold by pressing the tool in a square shape the cement slurry so as to obtain the right corresponding curve, once dry I covered the concave part with cellophane and inside I poured pitch and then on to the pitch I attacked us the aluminum support .
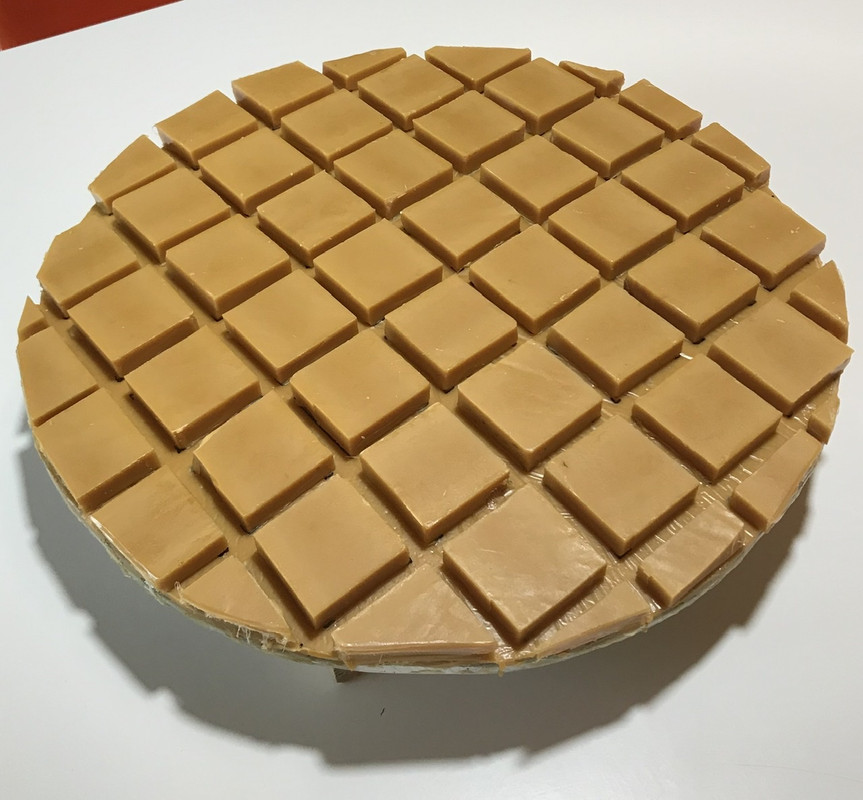
Following hardened pitch I attached above the curve of the pitch squares.
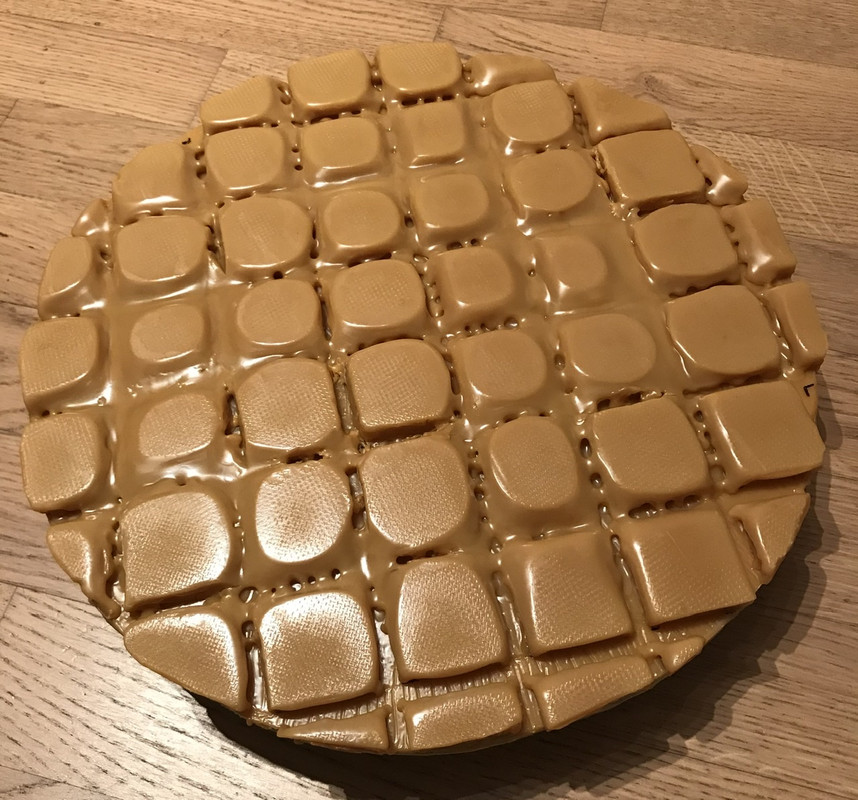
After that I tried to make the tool fit over the mirror as usual.
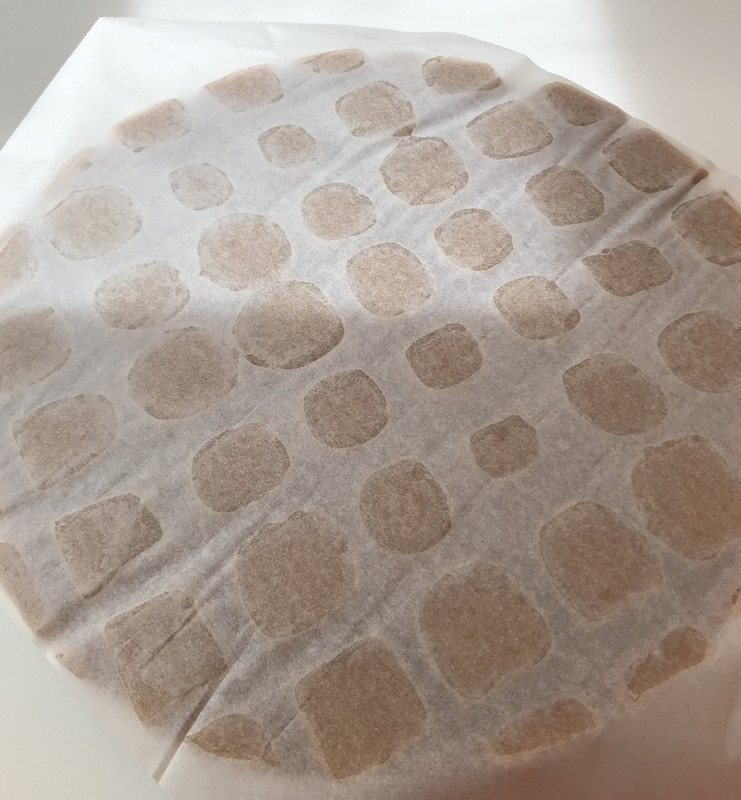
I used interlayer between mirror and tool greaseproof paper.
The problem encountered in this part of the procedure was the fact that the pitch squares are not all the same height (I do not know if you consider it a normal thing), so I had to warm up the tool several times before coming to a perfect adaptation of the same.

In the end though I think it went well as we can see from the picture adaptation.
Of course I left almost perfect square (4cm x 4 cm) and now I find myself irregular square, although I do not think it's a problem because in the videos Gordon created the square are not at all regular.If everything worked out nicely I should start to make a first processing polishing.
Before starting I need to clarify some aspects:
1) The micro facets on squares are indispensable and if you have to be recreated every time you consume?
2) As for the polishing mix I had read somewhere that you had to use 2 parts of water and an oxide.
3) Another question that I have is if I have to exert pressure on the tool during polishing or simply slide it on the mirror.Thank you!
Hello everybody!Luca
18 March 2020 at 1:20 #11697hi Luca, from a photo it is almost impossible to tell if the fit is good, It considers that a contact difference veneer / mirror of a tenth of a millimeter Center / Border is not a good fit. A couple of ways to check:
A- It should be noted the consumption of squares ( the surface becomes white in contact with cerium ), If after a session consumption is uniform and the color tends to lighten over the surface then it is ok, otherwise you can see which are the areas that are not in contact because they maintain the original color.B- if the mirror is polished and transparent on the back, you can try to put the mirror above and below the tool, after putting the mixture of water + cerium with a brush on squares. The squares in contact do not create air bubbles if not to the same edges quadrotto, while those that are little in contact, forming a central air bubble that moves when you move the mirror ( as the air bubbles of the levels ).
to answer your questions:
1-Not essential but help distribute the abrasive evenly, avoid overheating of the patina during races, help to improve the smoothness of reducing the friction and therefore the force required to move the tool on the mirror.
2-Too much water reduces the effectiveness, also too abrasive… The density of the mixture must be similar to a very fluid cream. The right mix is easily, it is prepared separately in a jar, if it is too dense water is added, if it adds little abrasive. Using a brush and put it on the glass or on the coating, It must be similar to the mixture of the colors with water “watercolor”.
3-only in some particular cases and when there is a need for processing that requires it, normally it is sufficient the weight of the tool. Rather, You must be careful not to put pressure on the board during the races. If you just need a little’ additional pressure, then it must always be applied to the center and with moderation.18 March 2020 at 9:41 #11698Hi Massimo,
therefore considered that after the adaptation of the tool presents some smaller dowels compared to other run the risk of performing a wrong polishing?
I have to redo the tool?
Average to run a good polishing how long it usually takes?Thank you.
See you soon!

Luca
18 March 2020 at 11:02 #11699Ma no, the size of the blocks do not count, must not be the same, if anything should not be more “low” or more “alti” with respect to the contact surface.
Average to run a good polishing how long it usually takes?
it is better if I tell you
 18 March 2020 at 11:21 #11700
OK thanks!
 18 March 2020 at 22:19 #11701
Hello geminimac.
Your questions that I read are a classic doubts of those who are about to polishing.I suggest you read the article tutorial that this site contains answers
This is because to answer here in full, I should bring back the entire content, starting with cerium oxide dilution.
About the tool instead of the grooves; Do not worry of their form. What matters it is the contact surface.
You will also read this, when you chipping a picture.
The grooves you must always restore them without problems, for example in your case with a soldering iron.
This is because when the melting of the pitch quedretti bound them together at the base (or when the tool is made by melting the surface in a single pitch, obtaining the grooves per impression with a plastic mesh) if you used a knife and a swing to blow up the pitch (how do you usually on the individual squares) since the pitch-jumps with ease, It would run the risk of breaking many adjacent squares ruining the tool in a too extensive manner.
And for the successful completion of the work without astigmatism, It is always recommended having to redo the tool in the course of work, starting from the guessing the hardness of the pitch that will not be too hard (and create errors area for its excessive deformability); or vice versa too soft to limp tapering too quickly.
Normality is able to arrive at the end of parabolizzazione with a minimum thickness of the squares of 2 o 3mm, which favors the best shape of the surface, when at that moment you find yourself having to deal with very few nanometers that make the difference of optical quality.Notions I read, used and remembered even in the preceding articles that indicated.
Ciao. good job
 19 March 2020 at 1:45 #11703
Thanks Giulio!

I had a look at what I've posted, it seems a good point of reference for my doubts.

Tomorrow morning I will experiment with the tool to see if I could do a good fit otherwise I'll have to make some corrections to the support.See you soon

Luca
-
AuthorPosts
- You must be logged in to reply to this topic.