- This topic has 178 replies, 6 voices, and was last updated 4 years, 6 months ago by
Giulio TiberinI .
-
AuthorPosts
-
25 January 2017 at 23:02 #9406
Here are the results achieved
25 January 2017 at 23:38 #9408I would say that in any way are on a very good road.
I speak for me, and I think that dug the arrow and an area that I think definitely good, and in any case to make spherical, (about the same as would also be the case if you had otenuta with chordal runs and the tool diameter full).
I would see a continuation with a full-diameter tool or almost, which is the only technical method tried and tested, that applying the races 1 / 3D center to center, (and not overflowing on the right-left), guarantees the realization of the sphere when in view of both the disappeared bubble of air between the two glass panes.
And all this without the need for controls that will only start from that point on.26 January 2017 at 0:28 #9409Luke well, I think you're doing a good job !

I agree with Giulio, the one that recommended is definitely the best way to get close to a sphere acceptable in reference to very tight tolerances optics.As it regards the light source of the Ronchi tester, a simple LED performs its function excellently, the important thing is that it has a front slit whose width is comparable to the space between two lines of the grid used for the test. For a grating 4 linee/mm ( 4 black + 4 transparent ) the space between two lines is 0,125 mm.
Knowing the exact number of lines / mm grating's own is very important if you want to compare your test with a simulation software.
26 January 2017 at 11:20 #9415@ Julius / Massimo
thanks a lot!

I treasure your advice and go on working with the tool diameter and ran almost full 1/3 diameter center of the center…let's see what happens in a few days!
If the center hole is not very deep already in short I should see good results…See you soon!
 27 January 2017 at 16:00 #9425
After a few sessions it appears the defect is slowly disappearing…
Now it remained a small track we see if it disappears entirely during polishing
 27 January 2017 at 23:07 #9426
Luca, if you're having good results and the defect is disappearing, waits before switching to polishing, also because working in pitch and polishing with cerium oxide, at each session you gratterai an infinitesimal amount of glass, roughly one hundred nanometers for dried, and completely eliminate a defect generated by the abrasive becomes very long and laborious.
Follow carefully what he says Giulio:
…guarantees the realization of the sphere when in view of both the disappeared bubble of air between the two glass panes.
And all this without the need for controls that will only start from that point on.in practice we must insist until the central air bubble does not disappear, leaving the place to numerous bubbles evenly scattered between the two panes.
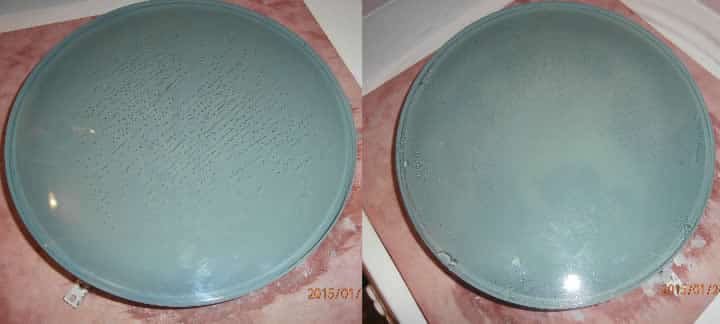
Nell’ left image, the central air bubble, It was shattered into many small bubbles , which indicate that the two surfaces are very close to each other.
in the right image, the bubbles are further fragmented into even smaller bubbles and more evenly spread, which means that the two layers are in contact along the entire surface: This is the time when you can and you have to go to polish it, says Giulio, those little bubbles evenly distributed tell us that we are faced with two good balls , no need any tests !Indeed, the only geometric figure ( non-planar ) which allows to always keep the two surfaces in contact, however, the move over one another, It is the sphere.
The absence of air bubbles during the movement mirror / tool is therefore only possible if the two surfaces are spherical, without the need for any additional tests.
27 January 2017 at 23:56 #9428So continuously until it disappears completely…

The thing that puzzles me is that if we pass over hand the defect do not you feel at all…
Possible that it takes so long to delete?I'm still using the grain 150 which it is not so fine!Thanks Massimo!
 16 March 2017 at 15:22 #9565
After repeated attempts finally think I've dug a ball…perhaps a parable!
I say maybe because I'm not sure that's just my theory to test, I rely on what I've learned in these months of grattavetro, a bit’ It was suggested by the measures that I find myself, measurements obtained accidentally or for c..o blow trying to delete a defect that persisted in the central area of the mirror, and a little’ for the image of the light source that see reflected.
Posizionandomi at the right distance that more or less coincides with the radius of curvature of the mirror find myself impressed the source of light that embraces the entire the entire surface and see it without distorted areas, in a nutshell an enlarged lamp…if I move away surpassing the radius of curvature of the source it shrinks, but remains constant at every point of the lens…
By looking at the lens of the small telescope I have at home the same thing happens, the reflected image remains the same in all points of the lens, constant!
I also read this article which refers to the caustic of reflection and good or bad also confirms what I say on the image reflected by a parabolic reflector and a sphere, unwittingly I dug the lens as shown at point B.
I say heresy?!
The next step now is to polish…I will get to work (barring unforeseen circumstances) next week…
I mainly like to thank Julius and Massimo that with their support and guidance they gave me the straight right to reach the goal! 16 March 2017 at 22:45 #9567
Good… on with polishing
 the actual shape of the mirror will be able to tell it to you only tests, the differences between parable and ball are so small that they are not in any way capable of visual perception. The fact that it forms a definite image focal plane ( the radius of curvature ) It is a good sign for a possible sphere, but from now on they will serve measurement and evaluation “nanometriche” that only Ronchi and Foucault will give you for levarti doubt.
  17 March 2017 at 8:45 #9570
I have to prepare for a possible Ronchi / Foucault nicely so I will test the mirror…
 4 January 2018 at 12:45 #10658
Hello guys good year,
are several months since I update 3D, However, the development of the lens is going on even if a little slow.
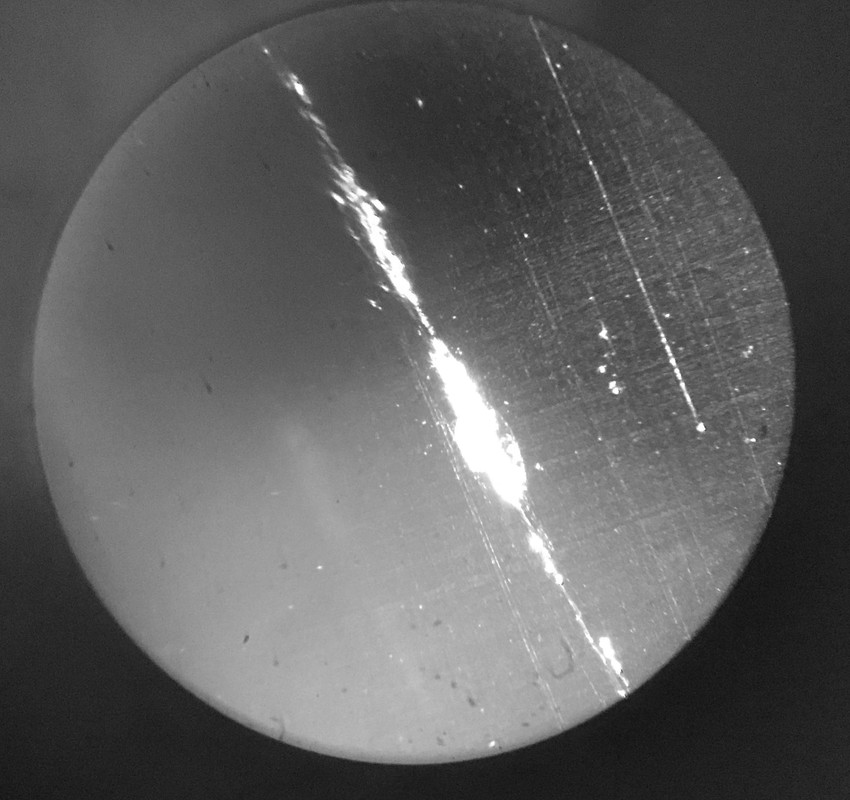
The mirror surface has been polished with grit 800, I removed almost all signs derived from previous grits, some lines are still present, 2 or 3 the ugliest 100x magnification: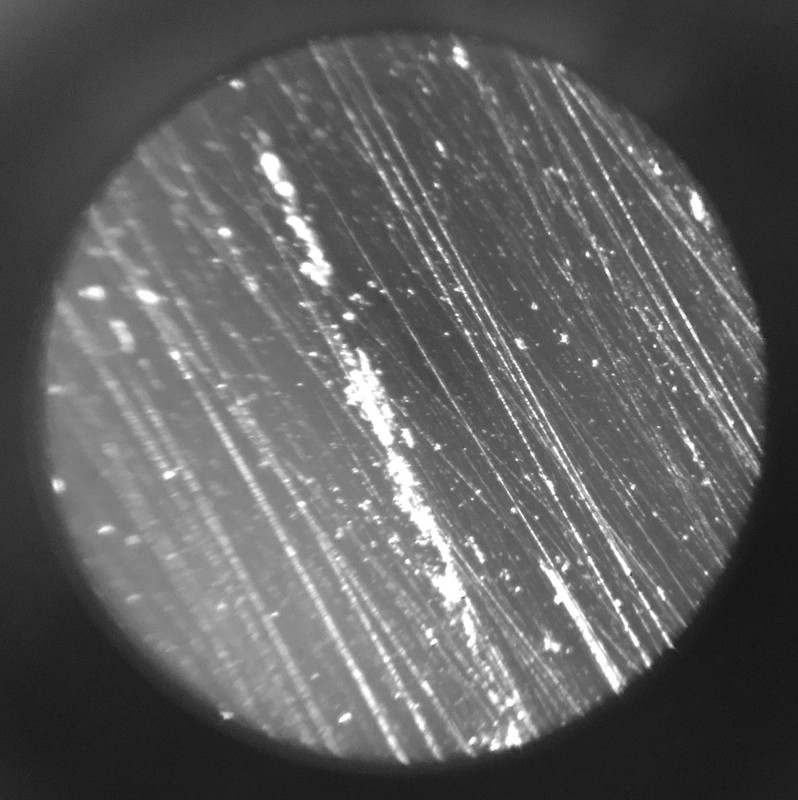
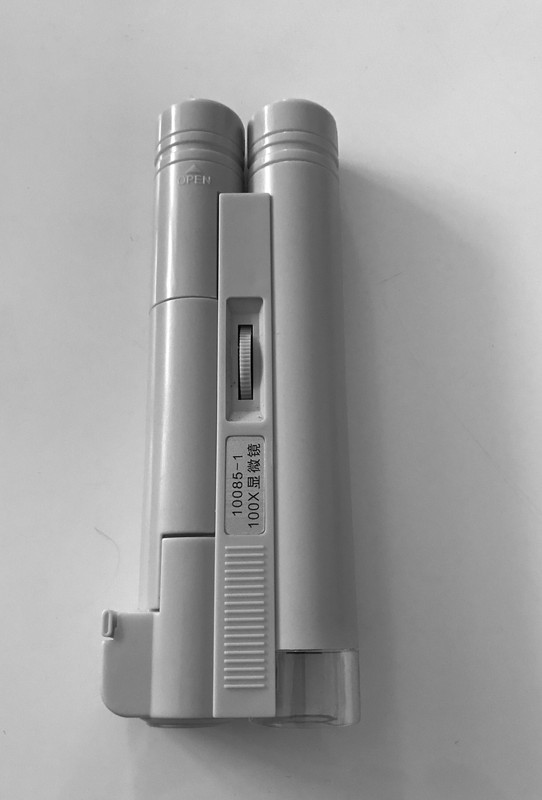
I used this microscope:
as regards instead the spherical shape of the results obtained are these:
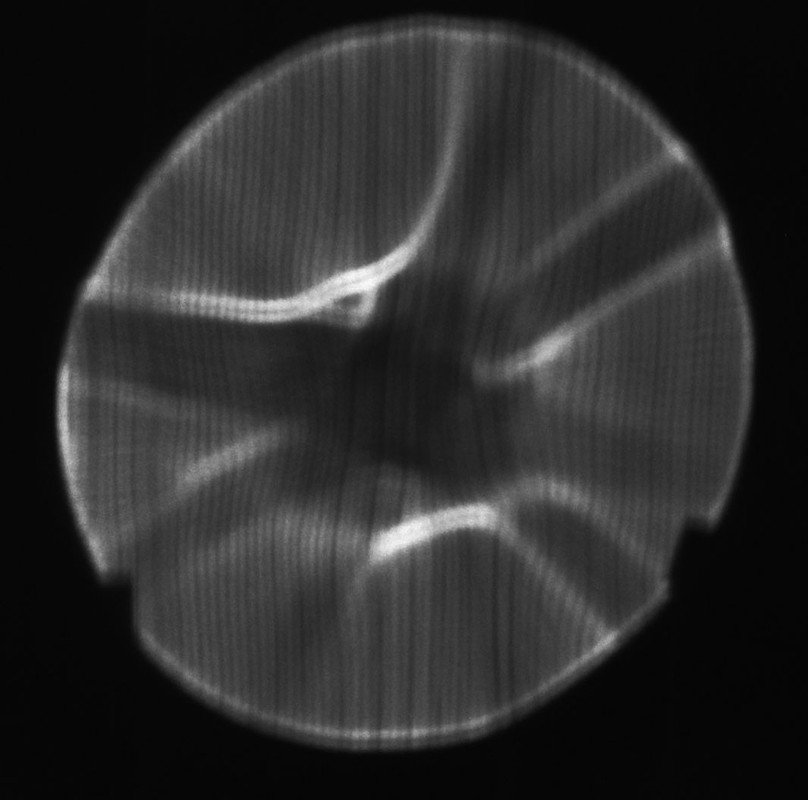
this Ronchi test was performed using a network of lines that I have made using a nylon thread wrapped around a wooden picture
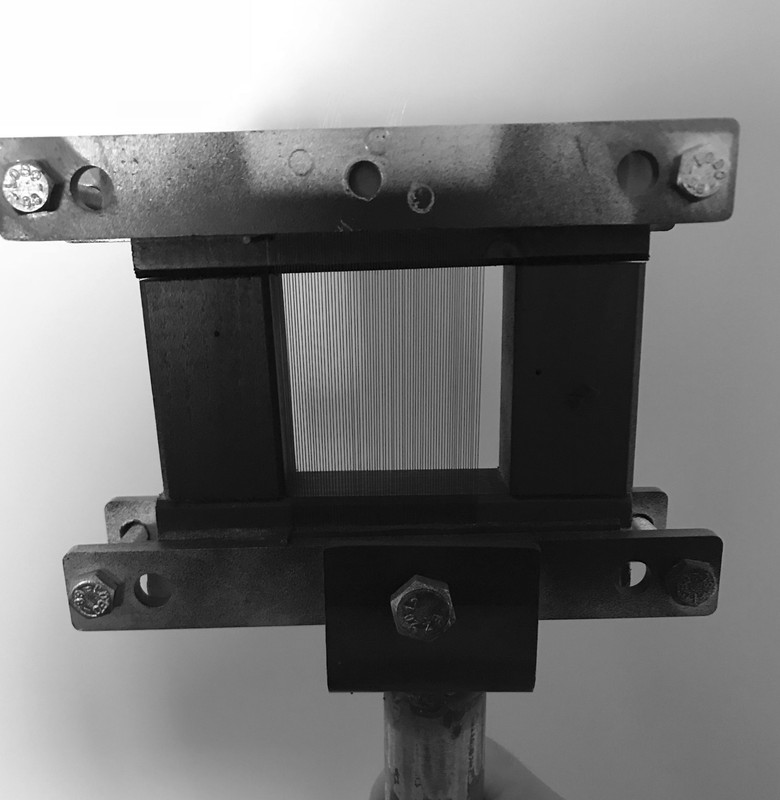
I realize that I am presenting Ronchi not perfectly keep the fees required but I can not do better, the light used is that of the smartphone Led, I tried other sources of light, but the result was really bad…
From what can be seen from the test photos we understand very well that they are not in front of a ball, There are many shortcomings to be corrected, for this I wondered if passing to the next step using the tool of pitch diameter almost everything with the cerium oxide can correct the surface for both sphericity for signs were.
Thank you
 5 January 2018 at 18:52 #10664
hello Geminimac.
In the two pictures which show signs still present on the mirror, I see a majority of scratches, whose width (Whereas the magnification to 100x) it would seem compatible with the size of grain 800.
The problem is that they are lines, and the rows are much more difficult to get rid of simple craters.I then went to re-read your previous post, and I realized that I had forgotten that the way you dig (at least the initial one), He did not use abrasive powder, and those images it would seem as if you're still using sandpaper 800 I stuck to your current tool, instead of the abrasive powder.
The abrasive powder digs much more efficiently because the rolling sharp hollow glass grains in a myriad of point craters, proportional to the diameter of the grain. While the abrasive paper complicates your life because it does not allow the abrasive roll, and it produces the excavation much more laboriously and with endless lines of different depth absolutely more difficult to make disappear as they would be a myriad of craters all well aligned to form a row, and not scattered randomly.
The use of a full-diameter tool, or nearly full diameter is the only way that guarantees to obtain a uniform sphere, assuming you use abrasive powder. Or at least, This is the way that is suggested by the texts written by people in the trade.
While it is the polishing effect which is obtained by the locking of the abrasive in the pitch; But that is another physical-chemical action to almost molecular level, due to the heat generated by friction, the pitch right pliability, the metal oxide polishing del'agente, and from the fundamental fact that the glass is an infinite viscosity material… but only at room temperature.The image of the entire surface, beyond its non-circular shape, I seem to understand that an excavation monsters with rises (ie reliefs) left imprinted repeatedly in different positions on the glass, from its pliability which is less likely shows along the longitudinal members in the form of X (Perhaps part of your turntable), at that stage of processing the mirror supported in those different areas, leading to dig more in adjacent areas.
With all this there is mulla irretrievable in your mirror at the present time. But I think you should find a method that will not depart too much from the orthodoxy of the common and conventional way of working. There is no harm in experimenting. Except that experimentation can become a “uncertain job in a not well-known work”, Reaching out enormously the way to reach the goal.
5 January 2018 at 20:57 #10666hello Giulio,
the present location the fastest way to obtain a tool diameter of almost everything that could be?
Obviously make a mold of the lens with pitch without adding beeswax and linseed oil using the abrasive 800 it does not work?
Somewhere I read that the only pitch turns out to be a very hard compound.As for the Ronchi test how can I build one done right?
That made me really sucks…the ugliest Ronchi history!
Maybe I could try testing using light microscope Led 100x…
When I have time these days try again
Thank you
 5 January 2018 at 23:34 #10667
As for the Ronchi test does not know you well advise to share images, because I've used in the visual but very rarely because I prefer the Foucault.
The tool: You may colarne a classical plaster dentist, on the mirror covered with foil and edged with a strip of cardboard to serve as contenutore. Or porvare to strain it in glue piatrellista (that if it is brand should have the same strength, but it is to be verified because it is my idea of the future trial but not yet tested, with the advantage compared to the cement to have a much finer particle size and similar to that of the special plaster).
Then are glued with epoxy on the face that copies the curvature of the mirror, of stoneware tiles, taking care not to create symmetries (ie in the tool center point must not be the center of a square tile, or a channel between rows of tiles). For the asymmetry are also fine irregular pieces of glass separated by but not too much space (5 o 10mm), But the glass is consumed much faster than stoneware.
In the case of chalk (each brand has two or three different hardness and usually of a different color) must be careful because the harder the product Gypsum, the higher the temperature reached during the hardening phase in 30 minutes following casting, and could break the mirror. (Some chalks also go beyond the catastrophic 100th if you do not pre-heats the mirror…but it is always dangerous operations)
The plaster I used did not create me problems, but others with other very hard stones have suffered the breakage of glass.The tool made of stoneware or glass can then be garnished with pitch for polishing and parabolizzazione.
As the tool of pitch, only serves to polish and parabolizzare after the surface is already spherical, because the abrasive grit trapped and not free, It does not remove that nanometers and not be able to correct the curvature to achieve the sphere.
I must say that the grain 800 it is already too late and you may have to return to 500 (obviously without pitch) or something less.The rosin (Colophone) tough and softens but at temperatures over 100 °, you can never reach by friction during processing. And the pitch serves precisely because it must yield slightly and continuously during processing, because if too soft does not work too hard and if errors zonal imprints.
So the pitch being a natural product is always different characteristics, and it must be found a recipe for the right pliability at room temperature, Get experimentally by adding linseed oil and / or beeswax, and / or turpentine.
A quieter alterantiva solution is to buy a pitch black bread Gugolz gradation 55 (for 20 ° working range of ambient temperatures) or gradation 63, for temperatures working environment of 25 °.
5 January 2018 at 23:43 #10669hi Luca, I did not understand what you mean by “The mirror surface was polished with 800 grit″…
I mean if:
1- the surface is still in the process of grinding with the grain 800 and the tool “rigid”
2- the surface is in the process of polishing with cerium oxide and tool pitch.-in the first case, the Ronchi test can not be performed because the surface is not reflective.
-in the second case the problem is in the correct realization of the tester.he ( and only if ) the surface is glossy and reflective, then you need to optimize the tester, first of all finding the exact size of the slot in front of the light source, without which the test can not produce legible results.
A rule of thumb says that the slit size should not exceed the distance between two grid lines, namely for a lattice from 4 linee/mm, DIM. maximum of the slot is of 0.125 mm -
AuthorPosts
- You must be logged in to reply to this topic.